Over the past 16+ years of selling our plugins on WordPress, we’ve researched all the best ways to increase sales worldwide. During this time, we’ve discovered that offering multiple payment methods is one of the easiest ways to boost conversions in different regions and customer bases.
For example, Bancontact is a popular payment system that is used mainly in Belgium. It lets customers make secure, real-time payments directly from their bank accounts. Whether your customers are shopping online, paying in-store, or splitting bills with friends, Bancontact provides a seamless and reliable way to complete transactions.
All that said, we believe adding Bancontact payments in WordPress can help you cater to a broader audience, boost your credibility, and increase conversion rates.
In this article, we will show you how to easily add Bancontact payments in WordPress, step by step.
Why Add Bancontact Payments in WordPress?
If you plan to attract customers from Belgium or nearby regions, adding Bancontact payments to WordPress is a must. Bancontact allows users to make real-time payments directly from their bank accounts using either their physical card or the Bancontact mobile app.
By offering it as a payment option, you make it easier for local customers to make purchases conveniently, increasing your sales and conversion rates.
Bancontact also supports contactless payments and offers two-factor authentication to protect buyers and sellers during transactions.
Plus, it’s super cost-effective, with transaction fees ranging from just €0.10 to €0.20 per purchase. This makes it an affordable option for businesses of all sizes.
To put it simply, when you add Bancontact, you can easily localize your payment options while still growing your global reach and appealing to a broader audience.
Having said that, let’s examine how to easily add Bancontact payments in WordPress. For this tutorial, we will use two methods. Use the links below to jump to the option that works best for you:
Method 1: Add a Bancontact Payment Form in WordPress
This method is for you if you want to add a Bancontact payment form to your WordPress website without building a full-fledged online store.
It can be ideal for accepting Bancontact payments in WordPress for donations, recurring membership fees, or any other professional services.
To do this, we recommend WP Simple Pay. After thorough research and testing, we believe that it is the best tool for the job. It has an intuitive builder, spam protection, and integration with multiple payment options.
Plus, it comes with a premade template for Bancontact payments. For more details about our experience, see our WP Simple Pay review.
To get started, you’ll need to install and activate the WP Simple Pay plugin. For details, see our tutorial on how to install a WordPress plugin.
Note: WP Simple Pay has a free plan. However, you will need the pro version to unlock the Bancontact Payments template.
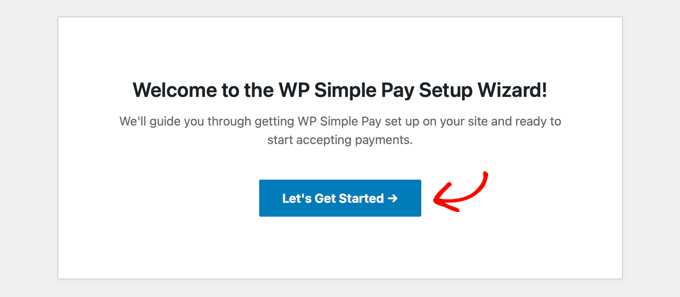
Once you activate the plugin, a setup wizard will open on your screen. Here, click the ‘Let’s Get Started’ button.
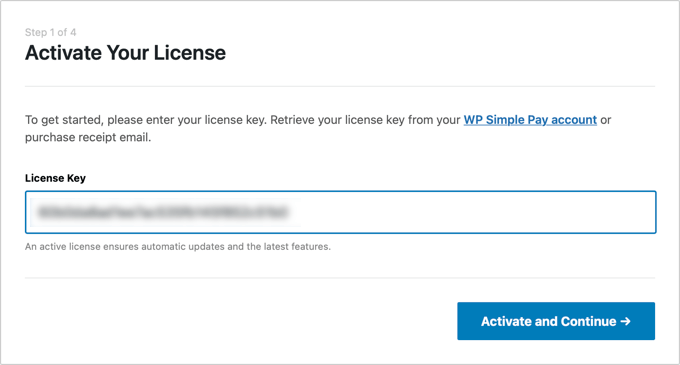
This will direct you to the next step, where you’ll have to enter your plugin’s license key.
You can get this information from your account on the WP Simple Pay website.
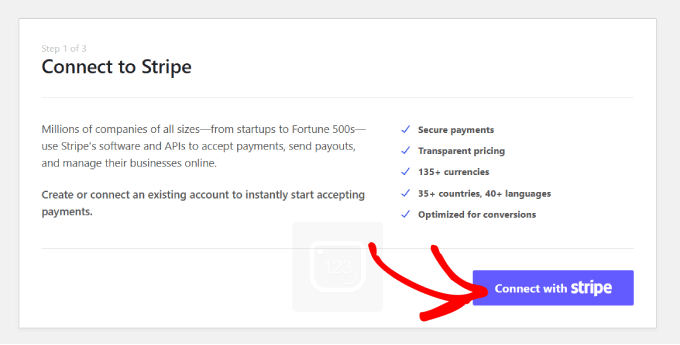
After that, you’ll need to connect your plugin with Stripe, a popular payment gateway, to accept online payments easily.
Keep in mind that since WP Simple Pay is a Stripe plugin, it won’t work on your website until you connect it with a new or existing Stripe account.
To get started, click the ‘Connect with Stripe’ button.
For more information, check out our tutorial on how to accept Stripe payments in WordPress.
Once you connect Stripe and WP Simple Pay, the setup wizard will ask you to configure your emails.
At this point, you can enable options to receive email notifications for payment receipts, upcoming invoices, and payment notifications.
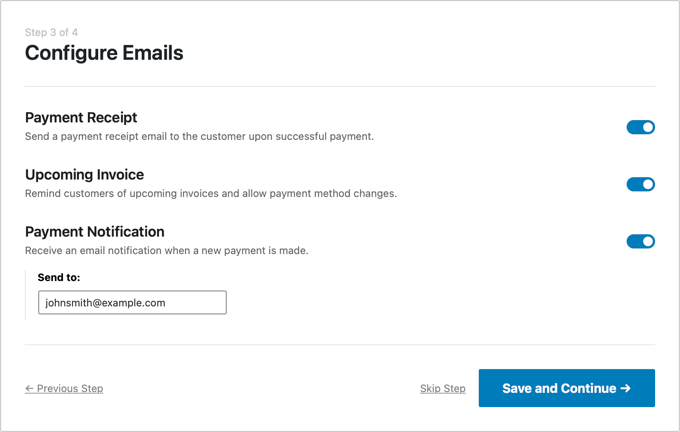
You will also need to enter the email address where you want the plugin to send these messages. Then, click the ‘Save and Continue’ button.
You can now complete the rest of the setup wizard steps according to your preferences.
After that, visit the WP Simple Pay » Payment Forms page in the WordPress dashboard and click the ‘Create Your Payment Form’ button.
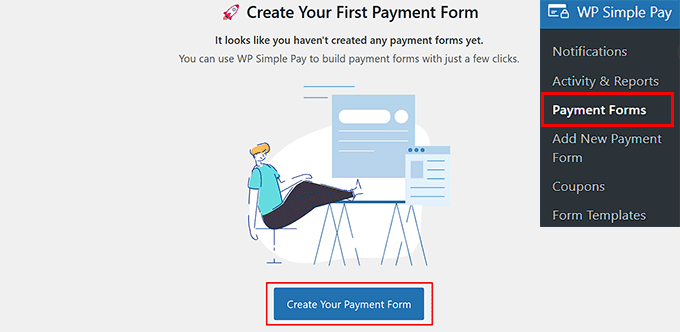
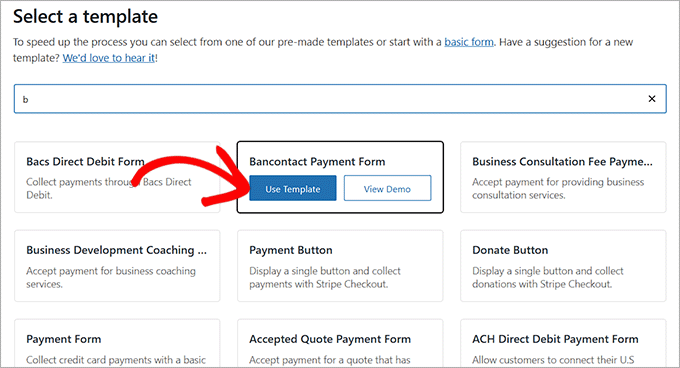
This will take you to the ‘Select a template’ page, where you will see a list of premade templates offered by WP Simple Pay.
From here, locate the ‘Bancontact Payment Form’ template. Once you find it, just click the ‘Use Template’ button under it.
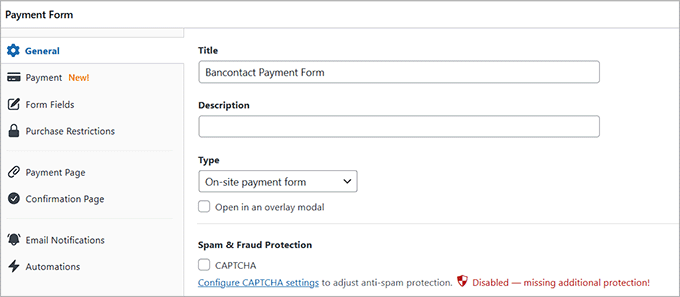
You will now be directed to the ‘Add New Payment Form’ page, where you can change your form’s title and add a description.
After that, you’ll need to select ‘On-site payment form’ as your form type. You can also check the box under it to turn on spam protection.
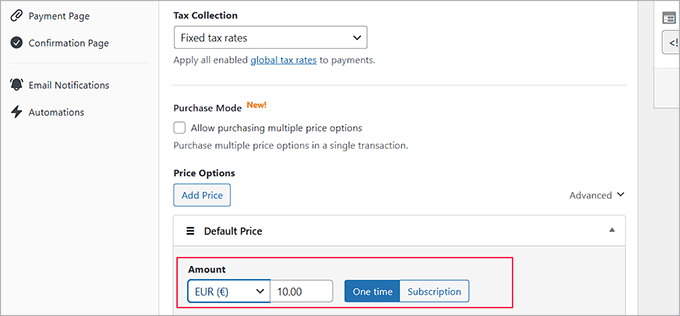
Next, switch to the ‘Payment’ tab in the left column and choose your preferred tax collection rates under the ‘Tax Collection’ option.
You can also set the price for the product or service you want to sell through the form. If you are offering a subscription-based service, then choose the ‘Subscription’ option. Once you do that, click the ‘Add Price’ button to create and include multiple subscription tiers.
Remember that you’ll need to choose the Euro as your preferred currency in this section. The Bancontact payment form won’t work if you don’t.
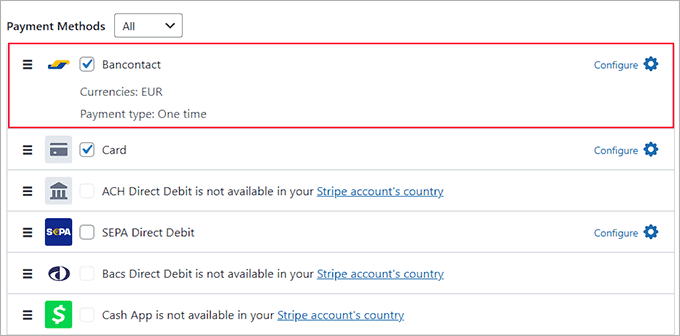
Now, scroll down to the ‘Payment Methods’ section and select the ‘All’ option from the dropdown menu.
Here, you will see that the Bancontact payment option has already been selected. You can also add other payment options, such as Klarna, AliPay, or Card if you like.
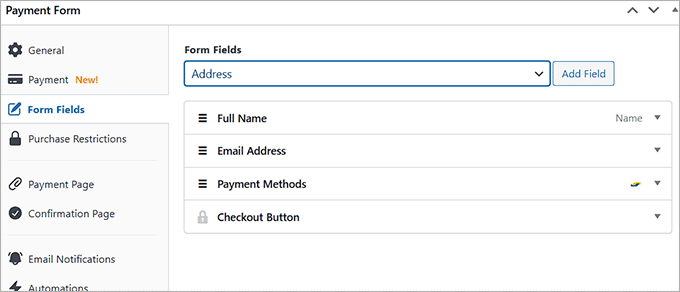
Next, go to the ‘Form Fields’ tab. You can add a form field from the dropdown menu and configure its settings by expanding the tab. Additionally, you can rearrange the existing fields by dragging and dropping them.
For instance, if you plan to sell a physical product that needs to be delivered, you’ll need to add an address field to your form. This will allow customers to easily provide their location when they make a purchase.
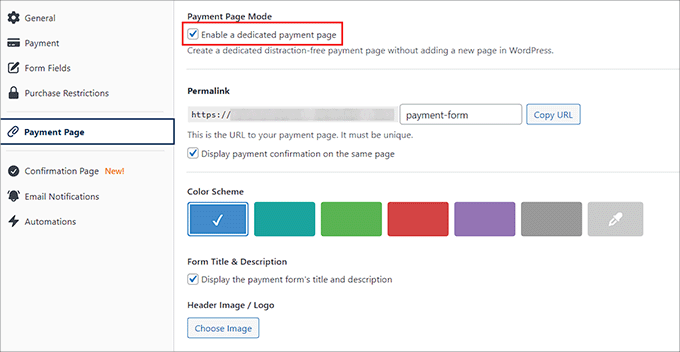
After that, head over to the ‘Payment Page’ tab and check the ‘Enable a dedicated payment page’ box. This way, you can create a custom payment form page without manually building a new page on your website.
The plugin makes it super easy to set a permalink, pick a color scheme, add your logo, and display footer text.
When you’re happy with your customizations, click the ‘Publish’ button to store your changes.
Now, visit your WordPress site on the front end to check out your new Bancontact payment form.
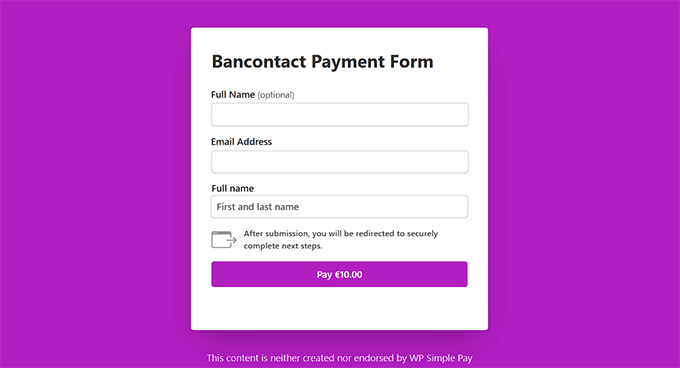
On the other hand, you can also add the Bancontact form to an existing page on your website. To do this, click the ‘Publish’ button after adding form fields.
Then, open the page or post you want to use in the WordPress dashboard and click the ‘Add Block’ (+) button in the top left corner. This will open the block menu, where you can search for the WP Simple Pay block.
After you add the block to your page, go ahead and select the payment form you created from the dropdown menu within the block.
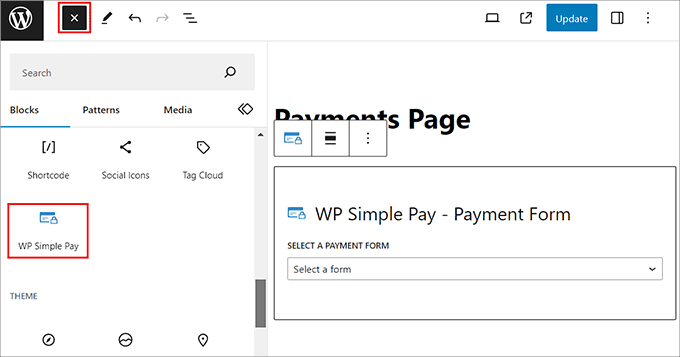
Now, click the ‘Update’ or ‘Publish’ button to store your settings.
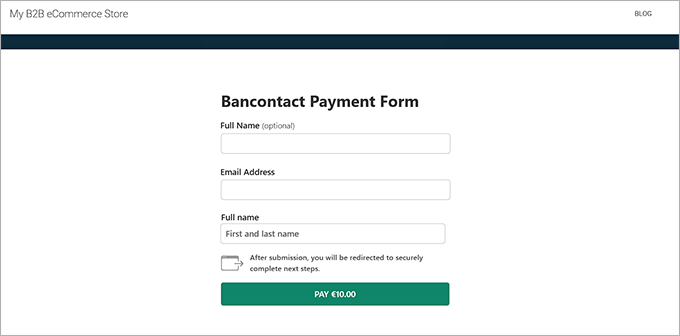
Then, feel free to visit your website to view the Bancontact payment form in action.
Method 2: Add Bancontact as a Payment Option in WooCommerce
If you want to add the Bancontact payment option to your WooCommerce store, then this method is for you.
The first step is to install and activate the Stripe Payment Gateway for WooCommerce plugin. For detailed instructions, see our beginner’s guide on how to install a WordPress plugin.
Upon activation, you need to visit the WooCommerce » Settings page from the WordPress dashboard and switch to the ‘Payments’ tab. Then, enable the ‘Stripe Gateway’ option and click on ‘Finish set up’ to the right of the description.
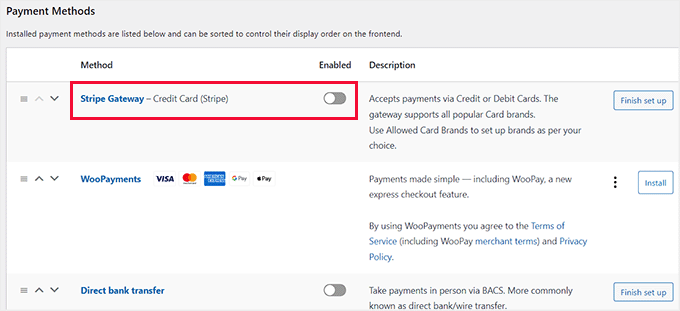
This will take you to a new screen, where you have to check the ‘Enable Stripe Gateway’ box. You can also add a title and description for the payment gateway.
After that, click the ‘Save Changes’ button to store your settings.
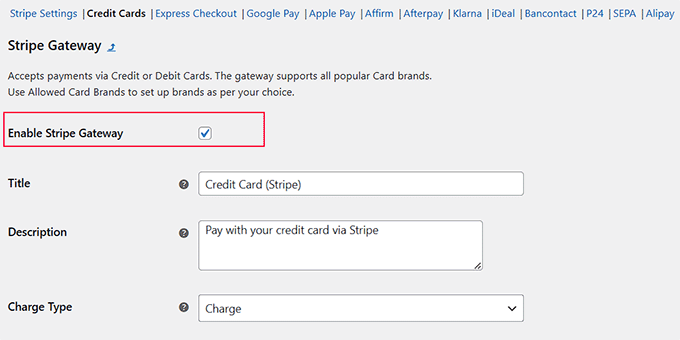
Once the page reloads, click on the ‘Stripe Settings’ link at the top.
On the settings page, click the ‘Connect with Stripe’ button to link the payment gateway to your online store.
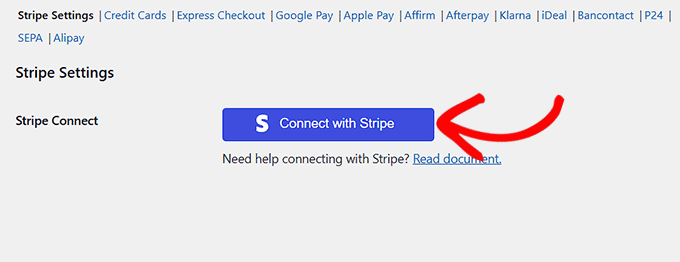
This will take you to a new screen where you can log in with your Stripe username and password. If you don’t have an existing account, then you can create a new one from here.
For more details, see our tutorial on how to accept payments with Stripe in WordPress.
After you have connected your WooCommerce store with your Stripe account, go ahead and click on the ‘Bancontact’ link at the top.
Once you do that, check the ‘Enable Stripe Bancontact Gateway’ option and add a title, description, company name, and selling locations where this payment method can be displayed.
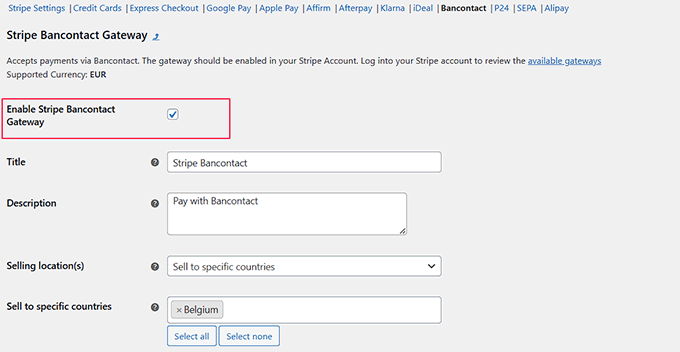
Finally, click the ‘Save Changes’ button to store your settings.
Now, visit your online store to view the Bancontact payment option.
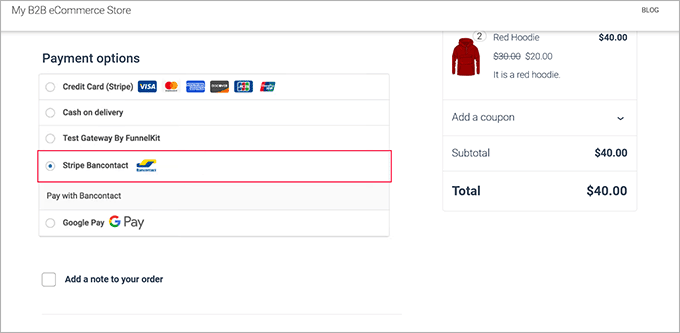
It’s as simple as that!
💡 Do you sell to customers in multiple European countries? If your website isn’t optimized for performance, faraway customers might experience slow page-loading times. This can lead to frustrated shoppers or lost sales.
Check out WPBeginner’s Site Speed Services if you want our team of WordPress experts to audit and optimize your website to ensure fast-loading pages worldwide!
Bonus: Accept GiroPay Payments in WordPress
If you have customers in Germany or Austria, then adding Giropay as a payment option to your online store is a smart move. With 40 million users, Giropay accounts for 10% of checkouts in Germany, making it a popular choice for secure transactions.
It is based on online banking, so payments are transferred directly from the customer’s bank account to yours at checkout. This not only ensures quick payments but also comes with lower fees compared to other methods.
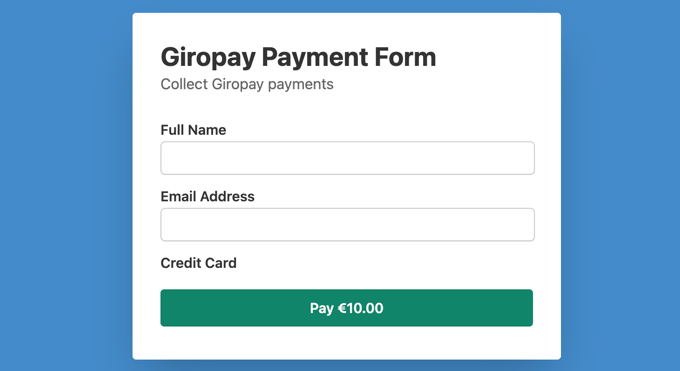
To add GiroPay payments in WordPress, you can use WP Simple Pay.
It is a powerful Stripe plugin that accepts multiple payment options, including Bancotact, SEPA, Affirm, Klarna, and GiroPay.
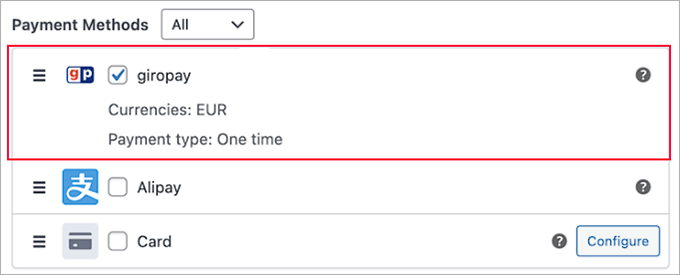
For more information, see our tutorial on how to accept GiroPay payments in WordPress.
We hope this article helped you learn how to add Bancontact payment in WordPress. You may also like to see our beginner’s guide on how to accept Google Pay in WordPress and our top picks for the best Square WordPress plugins.
Wenn Ihnen dieser Artikel gefallen hat, dann abonnieren Sie bitte unseren YouTube-Kanal für WordPress-Videotutorials. Sie können uns auch auf Twitter und Facebook finden.


Have a question or suggestion? Please leave a comment to start the discussion.