We’ve customized the WordPress admin area for dozens of clients over the years. Whether it’s simplifying the layout or adding a touch of branding, a cleaner dashboard always makes the site feel more polished.
The default admin area works, but it’s not always beginner-friendly. It can feel cluttered, especially when plugins add their own widgets and menus.
That’s why we often remove the distractions, organize the menus, and make the dashboard easier to use — especially for non-technical users.
In this guide, we’ll show you how to customize the WordPress admin area and dashboard without writing any code. It’s beginner-friendly and totally safe to follow.
Here is a brief overview of the topics we will cover in this article:
- Why Customize the WordPress Admin Area?
- Hiding WordPress Admin Elements with Screen Options
- Customize Block Editor Screen in WordPress Admin Area
- Show or Hide WordPress Admin Menu Items
- Customize What Appears in WordPress Admin Toolbar
- Change The WordPress Admin Color Scheme
- Create a Custom Login Page for WordPress Admin Area
- 🔒 More Ways to Personalize and Secure Your WordPress Admin Area
Ready? Let’s get started.
Why Customize the WordPress Admin Area?
If you’ve been managing a WordPress website for a while, you’ve probably seen the admin area fill up with widgets, menu items, and plugin notices.
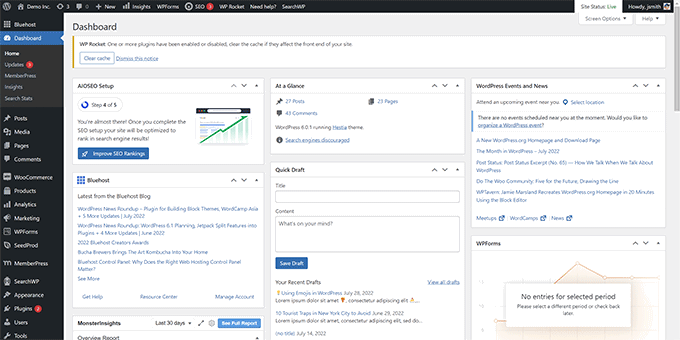
Some alerts disappear after you dismiss them. But many others stick around and show up across different admin screens.
What most beginners don’t realize is that you can actually clean this up. You can hide unwanted items, rearrange widgets, and personalize the dashboard to fit your workflow.
We’ve done this for clients to help them focus on what matters and avoid distractions. It’s a great way to simplify the admin area — especially for non-technical users.
In the next steps, we’ll show you how to customize the WordPress dashboard in a way that’s beginner-friendly and safe to follow.
Tired of a Cluttered Admin Area? 🧹
If your WordPress dashboard feels messy or overwhelming, you’re not alone. Get our on-demand WordPress support service to clean it up and customize it for your exact needs — no code, no stress, just a better experience every time you log in.
1. Hiding WordPress Admin Elements with Screen Options
Many WordPress admin pages, including the main Dashboard, have a Screen Options button at the top right corner of the screen.
Clicking on it will bring a fly-down menu with different options. Simply uncheck the options you don’t want to see, and they will disappear from that page.
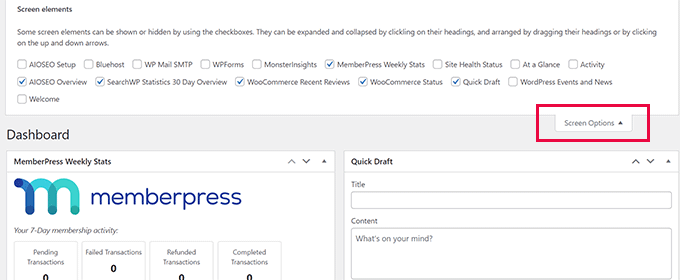
For instance, on the ‘Dashboard’ page, you can hide widgets you have never used and keep the widgets that provide valuable information.
While on the ‘Dashboard’ page, you can also drag and drop widgets to rearrange them on the screen. For instance, you can move your ‘At a Glance’ widget and ‘Site Health‘ widget to the top.
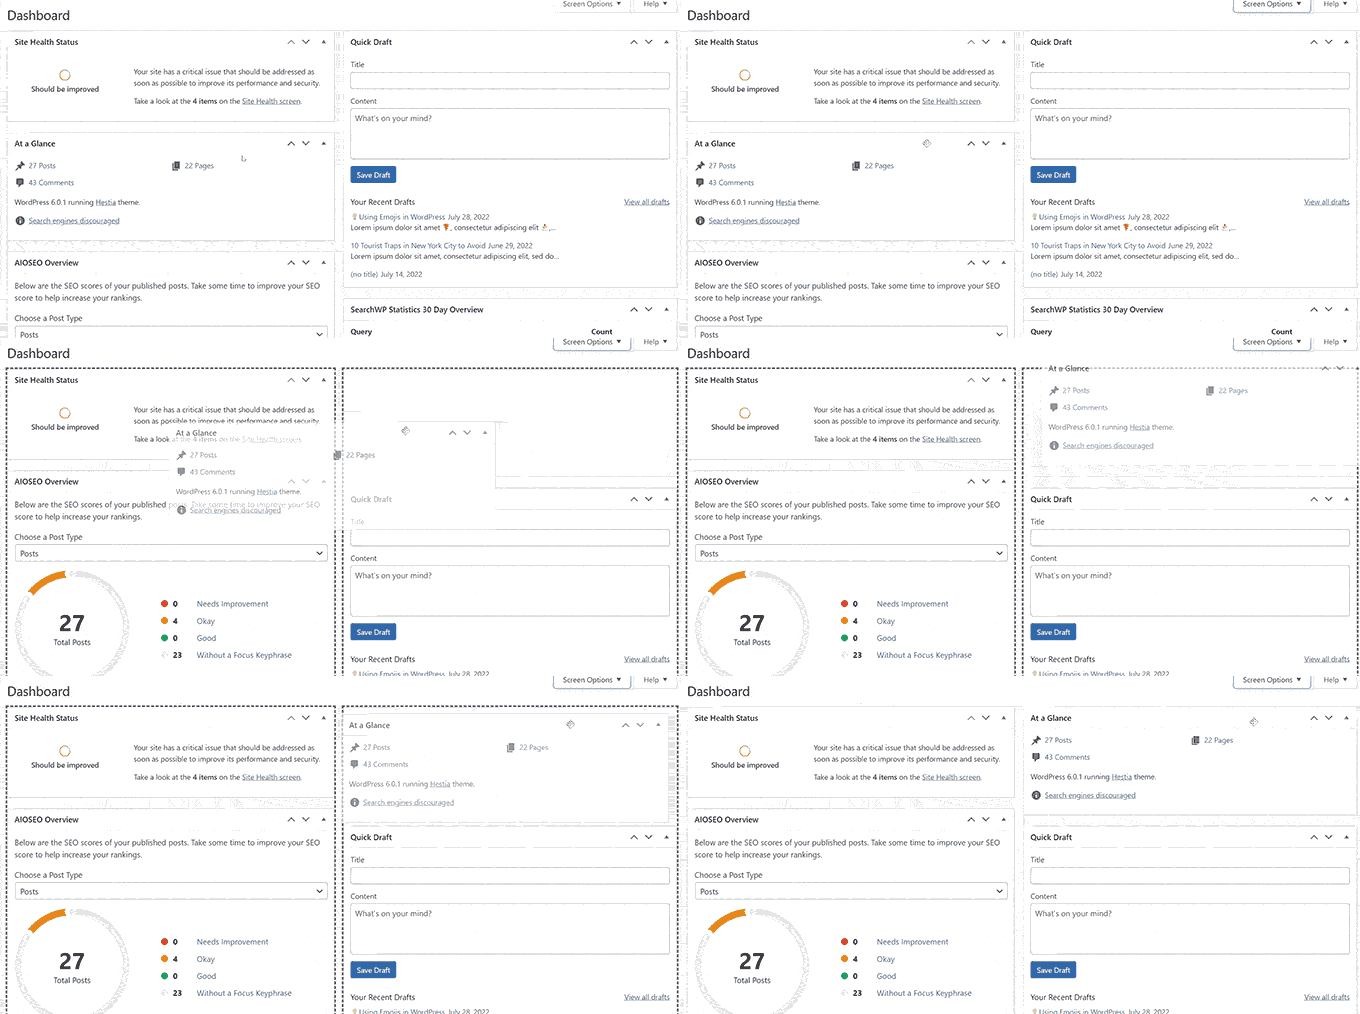
The ‘Screen Options’ button will show you different options depending on which page inside the WordPress admin area you are looking at.
For instance, on the Posts » All Posts page, the screen options button will allow you to show or hide columns, change the number of posts displayed, or switch to an extended view.
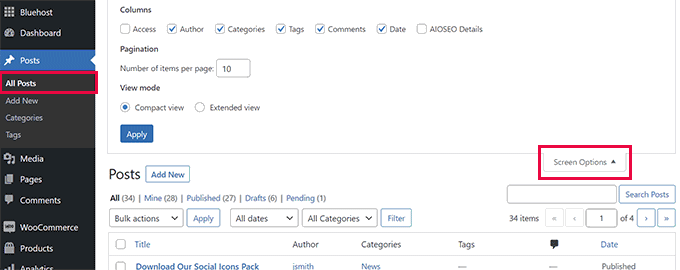
Try using the ‘Screen Options’ feature on different pages inside your WordPress admin area to see the options available to adjust those pages to your own needs.
Note: Screen Options settings are stored for each user. Your changes will not apply to other users or authors on your WordPress site.
2. Customize The Block Editor Screen
An average WordPress user spends most of their time using the Block Editor. This is the default WordPress content editor you use to write blog posts and create pages for your website.
The block editor already comes with a clutter-free user interface that provides you with lots of room to edit your content.
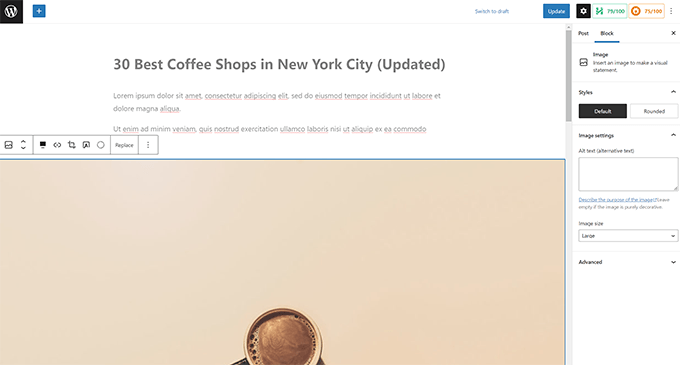
However, it also allows you to adjust specific settings to make your writing experience even better.
To access your preferences, simply click on the three-dot menu button at the top right corner of the screen and select the ‘Preferences’ option.
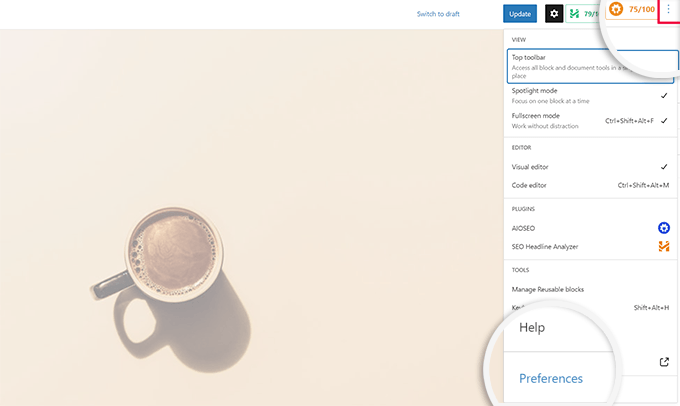
This will bring up a popup where you can adjust different settings for the block editor.
First, under the ‘General’ tab, you can reduce the User Interface, which will make the interface more compact.
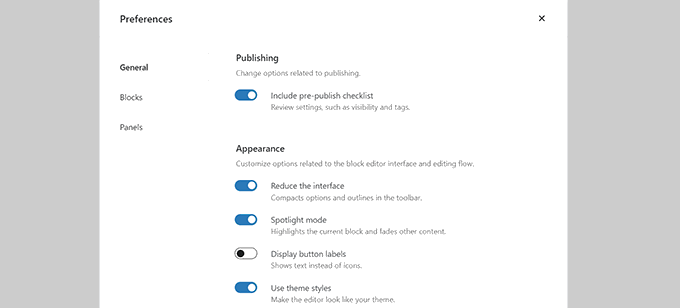
You can also turn on the ‘Spotlight mode,’ which will only highlight the block you are in and fade other parts of the screen.
Next, you can switch to the ‘Blocks’ tab. From here, you can show and hide blocks that are available for you inside the editor.
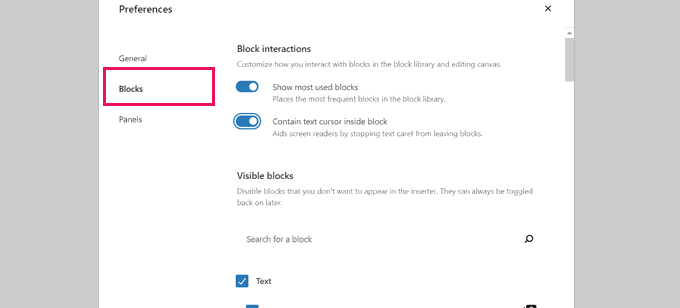
Lastly, the ‘Panels’ tab has even more options.
From here, you can decide which panels are shown or hidden inside the block editor’s right-hand sidebar.
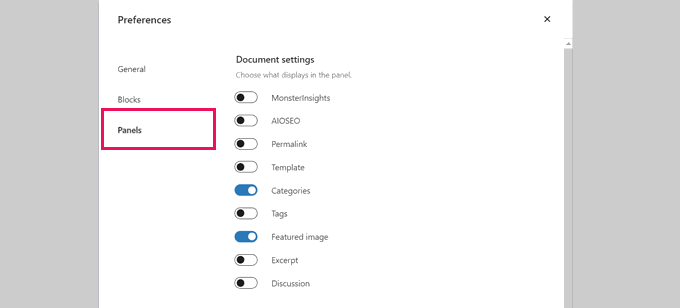
Once you have hidden the features you don’t use, you can click the ‘X’ in the upper-right corner to return to the post editor.
Next, clicking on the ‘Gear’ icon at the top will expand or hide the settings panel. This comes in handy when you are working with full-width content layouts.
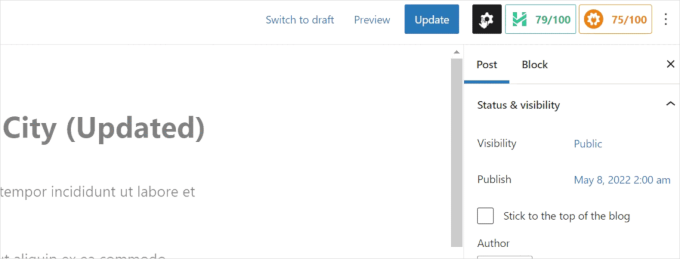
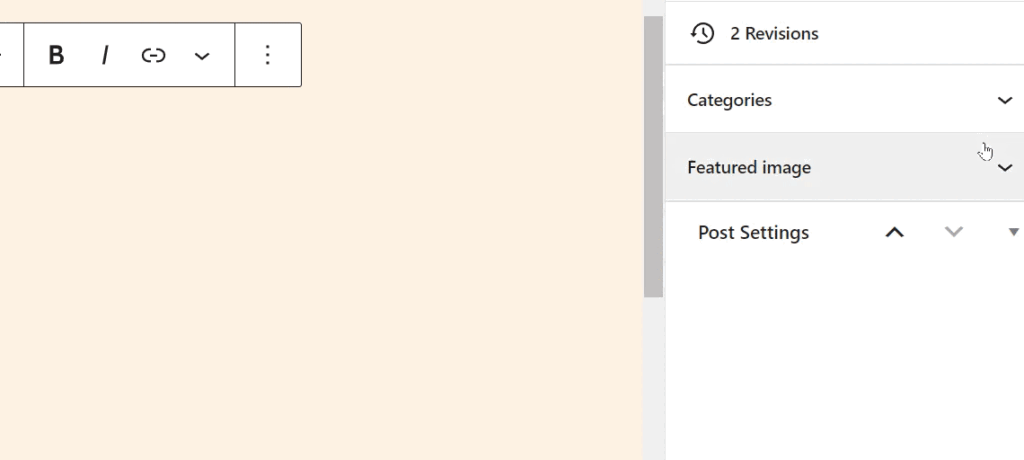
Inside the sidebar brought up by the Gear icon, you can choose to collapse any tab by clicking on the upward arrow.
This will clear additional clutter and help create a distraction-free block editor screen for you.
You may also want to see these extra tips on mastering the WordPress content editor to make your content creation experience more pleasant.
3. Show or Hide WordPress Admin Menu Items
As you install more WordPress plugins on your website, you will see that many of them add their menu items to the left-hand sidebar menu in your WordPress admin dashboard.
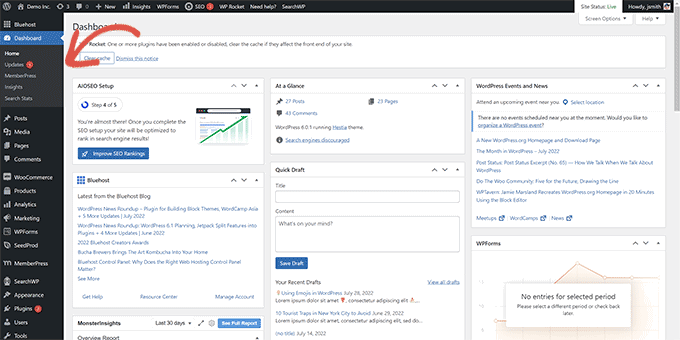
You may need to access some of them regularly. For instance, you may want to easily access contact form entries or fine-tune the SEO settings for your WordPress blog.
However, you may not need constant access to some of these menu items, or you may not want other users on your site to see them.
Luckily, there is a plugin to help you control which menu items appear in your WordPress admin sidebar. You can also control which user role can see a menu item in the admin area.
First, you need to install and activate the Admin Menu Editor plugin. For more details, see our step-by-step guide on how to install a WordPress plugin.
Upon activation, you need to visit the Settings » Menu Editor page to configure admin area menus.
You will see all the main menu items in the first column. Clicking on a menu item will show child items nested beneath it in the second column.
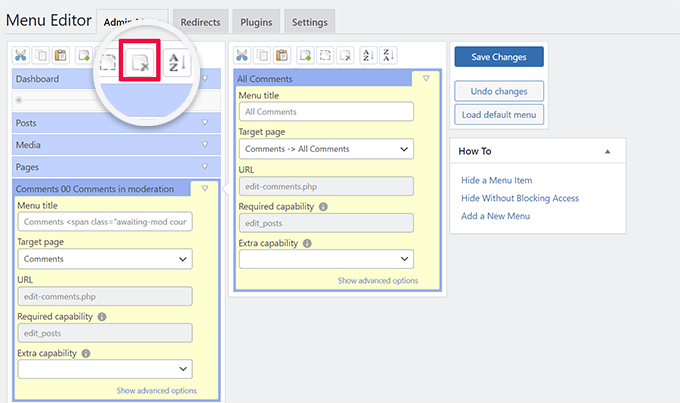
You can click to select a menu item and then click on the delete button at the top toolbar to remove it.
You can also restrict who can see a menu item in the WordPress admin sidebar. Click to select a menu item, and then under settings, set a restriction under ‘Extra capability.’
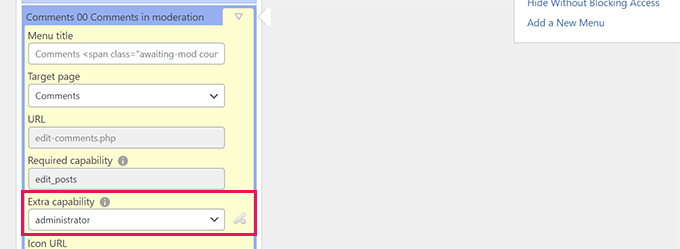
For instance, in the image above, we have hidden the Comments menu item from all users except those with the Administrator user role.
Once you have made changes to the admin area menus, don’t forget to click on the ‘Save Changes’ button to store your settings.
The plugin will show your customized WordPress admin area menus on the screen.
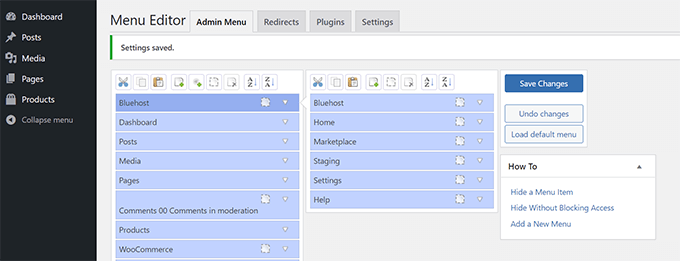
If you don’t see the changes appear immediately, you might have to refresh your page or log out and back in for the menu customizations to show up.
For more details, see our complete tutorial on how to hide unnecessary menu items in the WordPress admin area.
4. Customize What Appears in WordPress Admin Toolbar
The admin toolbar is the menu on top of WordPress admin area screens. The toolbar is also visible when you visit the public areas of your website while logged in.

To customize the WordPress admin toolbar, install and activate the Adminimize plugin. For more details, see our step-by-step guide on how to install a WordPress plugin.
Upon activation, go to the Settings » Adminimize page and look for the ‘Admin Bar Backend Options’ and ‘Admin Bar Front End Options’ tabs.
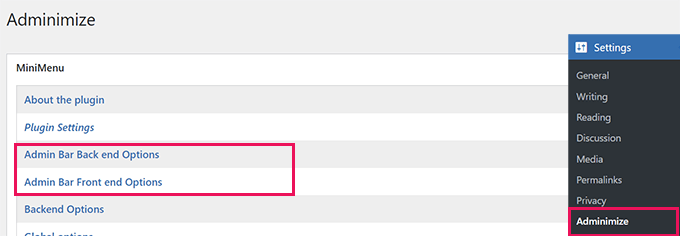
Clicking on either of them will take you to an options screen where you can select which items to display in the WordPress admin bar.
You can also choose items that will be visible to each user role.
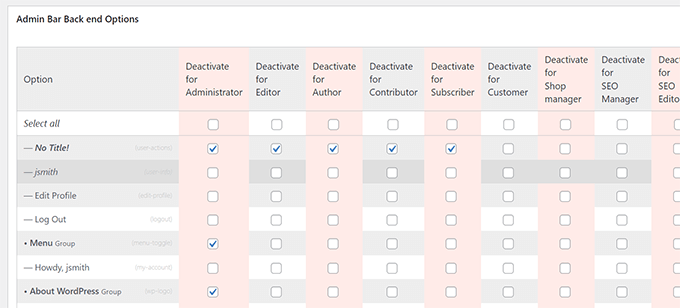
Don’t forget to click the ‘Update options’ button to save your changes.
For more details, see our beginner’s guide to the WordPress admin toolbar.
5. Change The WordPress Admin Color Scheme
WordPress comes with a few basic color options that you can use for the admin area.
Simply head over to the Users » Profile page and find the ‘Admin Color Scheme’ options.
You have to click a color scheme to preview it in the WordPress admin area.
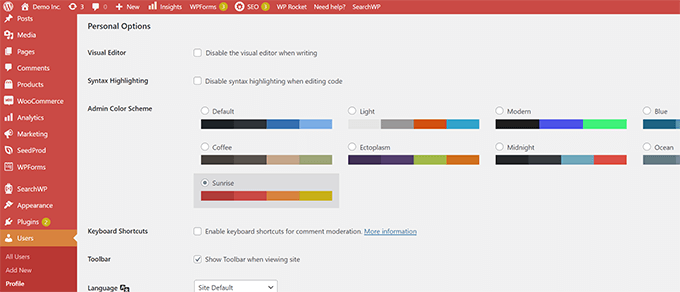
Don’t forget to click on the ‘Update Profile’ button at the bottom to save your changes.
Don’t like the available color schemes?
You can make your color scheme by installing and activating the Admin Color Schemer plugin. For more details, see our step-by-step guide on how to install a WordPress plugin.
Note: The Admin Color Schemer plugin may show a warning that it hasn’t been updated for a while. That’s because the plugin didn’t need an update. It is created by the WordPress Core Team and is safe to install.
Upon activation, you need to visit the Tools » Admin Colors page to create your color scheme.
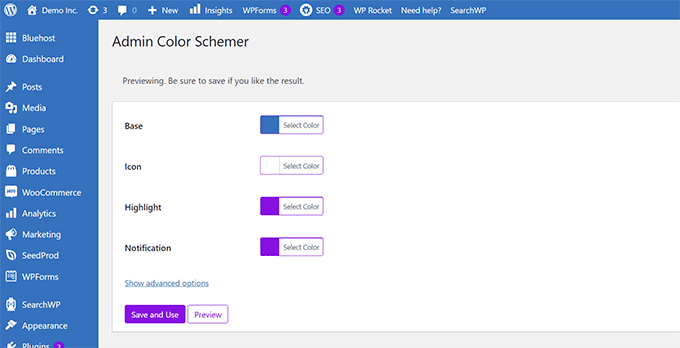
When you’re happy with your customizations, click ‘Save and Use’ to apply them to the dashboard.
Note: You can undo the color changes by deactivating the plugin or loading the default color scheme under the Users » Profile page.
For more details, see our tutorial for beginners on how to change the WordPress admin color scheme.
6. Create a Custom Login Page for The WordPress Admin Area
Want to replace the default WordPress login page with your own custom login page without writing code?
For that, you’ll need SeedProd. It is the best WordPress page builder that allows you to design your WordPress website with a beautiful drag-and-drop tool (no coding required).
First, you need to install and activate the SeedProd plugin. For more details, see our step-by-step guide on how to install a WordPress plugin.
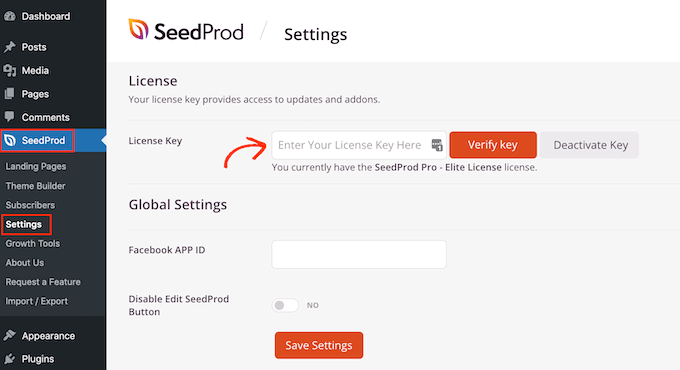
Upon activation, go to the SeedProd » Settings page to enter your license key. You can find this information under your account on the SeedProd website.
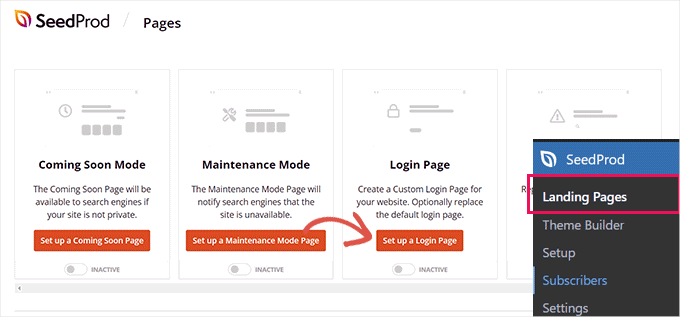
After that, head over to the SeedProd » Landing Pages.
You will now see a choice of landing pages you can create, so find the one labeled ‘Login Page’ and click on the ‘Set up a Login Page’ button.
Next, you’ll be asked to choose a template for your login page design.
SeedProd comes with a bunch of beautiful designs that you can use as a starting point.
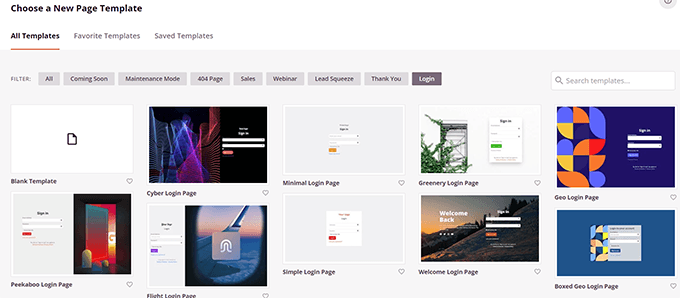
Simply click to select a template and then provide a name for your login page.
This name will be used internally to identify this page when you need to edit it again.
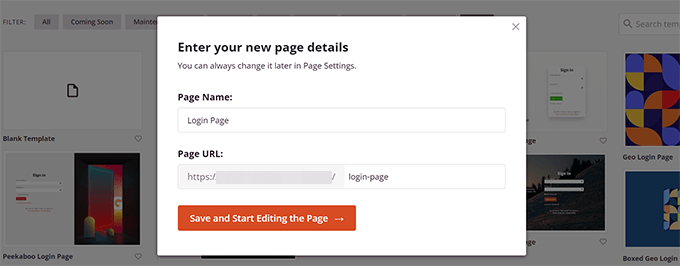
Click on the ‘Save and Start Editing the Page’ button to continue.
This will launch the SeedProd page builder interface. It is a drag-and-drop design tool where you can point and click on any item on the screen to edit it.
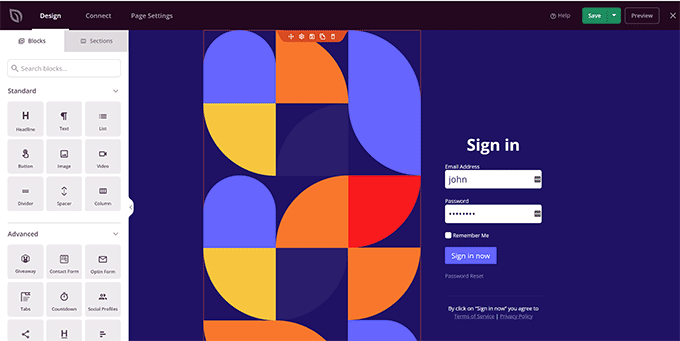
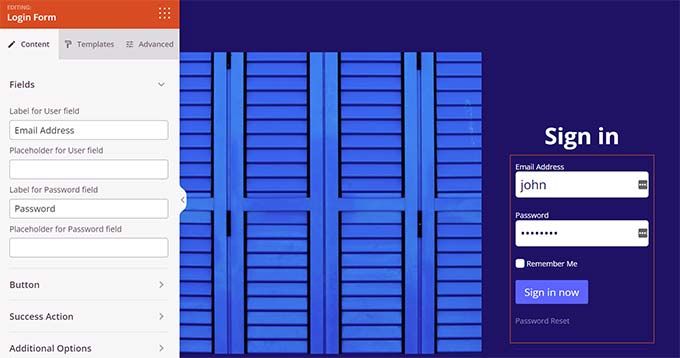
You can add new items from the sidebar or edit the login form to choose what happens after users log in.
You can also adjust any form labels or text in addition to the page design itself.
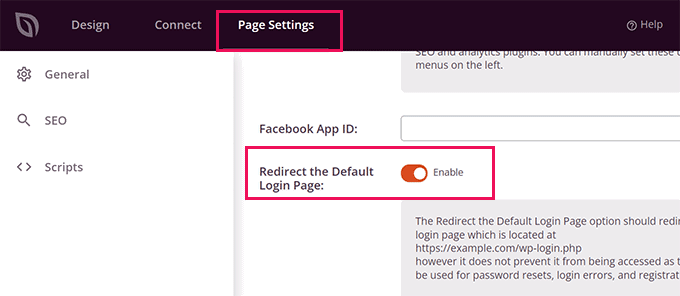
Once you are finished, switch to the ‘Page Settings’ tab in the builder.
Scroll down to ‘Redirect the Default Login Page’ option to turn it on.
Finally, don’t forget to click on the ‘Save’ button in the top-right.
Then click ‘Publish’ to create your new login page.

You can now visit the normal login page of your WordPress website.
You’ll see your custom design instead, and so will your users.
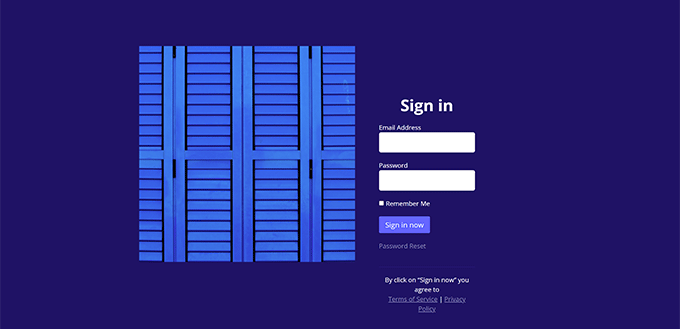
For more details, see our guide on how to create a custom login page for WordPress.
🔒 More Ways to Personalize and Secure Your WordPress Admin Area
Customizing the dashboard is just the beginning. If you want a fully personalized and secure admin experience, here are a few more guides worth checking out:
- Free WordPress Admin Themes to Customize Dashboard
- How to Create a Custom Login Page for WordPress
- Beginner’s Guide to WordPress Security
- How to Limit Login Attempts in Your WordPress Login Page
We hope this article helped you learn how to customize the WordPress admin area easily. You may also want to see our guide on adding a notification center to the WordPress dashboard or check out these useful plugins to improve the WordPress admin area.
If you liked this article, then please subscribe to our YouTube Channel for WordPress video tutorials. You can also find us on Twitter and Facebook.


Jiří Vaněk
I really appreciate the section about customizing the block editor. I’m used to Elementor and SeedProd Page Builder, so Gutenberg has always felt a bit cluttered to me. This helped me optimize it and make it much more user-friendly. Thanks!
WPBeginner Support
You’re welcome!
Admin
Dayo Olobayo
I literally laughed at for not knowing what the “screen options” button is used for all this while. Using this alone just made my admin dashboard look neat. I’m definitely trying the other tips out. Thanks a bunch!
tony robert
well…everything has a cost…i feel you should have provided few more info about the side bar tools like appearances – widgets…description…tittle..tags..few more
Melissa
I did use the wordpress during the college about 3 years ago. Right now, I don’t want to use hosting service…just want to use the wordpress to practice more, updated stuff to learn and play around. Is there a way to use without install the hosting?
WPBeginner Support
No. However, you wouldn’t have to deal with hosting stuff. Once setup properly, your WordPress site would run without you having to manage any hosting related issues.
Admin
mandy
Thank you so much……I learn many things for my beginning WordPress career……wpbeginer is so helpful for me
Gowebbaby
I think this is most basic yet most important part. Everyone don’t know how to customize admin area in WP and your article is very helpful for the.
If the first step will be right then rest will go fine…
Thanks for nice sharing.
Diana M Cook
I found this to be a wonderful tool…I am a novice but not for long now..this tool is perfect for the novice..thanks so much for lessening the load…too much dashboard is not helpful..lol
Brad
You know I have been using WP for about 2 years and have never looked at changing the Admin area to be more suited to my needs, I didnt even know it could be done! thanks for the tip, will get on it!
Adam W. Warner
Nice write up and clear instruction as always. I wrote a similar tutorial a couple weeks ago focused on decluttering the admin area for your users (Authors, Editors, etc.)
[Link Removed]