An image gallery is one of the best ways to showcase visual content and make your WordPress site more engaging. It lets you add photos in rows and columns, allowing you to display more photos in less space while also making it easier for users to browse them.
Whether you are a photographer, blogger, or business owner, using galleries can help you display images in an organized, professional, and eye-catching way.
Over the years, we have noticed that websites using image galleries tend to attract more traffic and have higher retention rates. Users often spend more time on these sites exploring the galleries, which keeps them engaged longer.
In this article, we will show you how to easily create an image gallery in WordPress that makes your photos look even better.
Why Create an Image Gallery in WordPress?
WordPress makes it super easy to add an image to your blog posts and pages. You just need to add the Image block and upload your image.
However, if you add multiple images to your WordPress website, they will appear one after another. This doesn’t look great, and your users will have to scroll a lot to view them all.

Creating a gallery allows you to display images in a grid layout with columns and rows. You can show thumbnails for your pictures, and users can click on them to see the full image.
This way, you can show more photos in less space, and it will look much more professional.
For example, if you are creating a photography website to display your images, then adding a photo gallery allows you to display your work in an aesthetically pleasing way.

With WordPress, you can easily create an image gallery using the Gallery block in the Gutenberg block editor.
You can also use WordPress gallery plugins to create even better galleries with more features.
Having said that, let’s see how to easily create an image gallery in WordPress.
For this tutorial, we will be showing two methods to create a gallery, and you can use the links below to jump to the method of your choice:
Method 1: Create an Image Gallery With WordPress Block Editor
This method is for creating an image gallery using the WordPress block editor. However, keep in mind that this feature is very basic and does not offer many customization options.
First, you need to open an existing or new post/page where you want to create the gallery from the WordPress admin sidebar.
Once you are there, just click the ‘+’ button in the top left corner of the screen. From here, find and add the Gallery block to the page or post.
Once you have done that, click the ‘Upload’ button to upload new image files from your computer.
However, if you want to upload images from the media library, then you must click the ‘Media Library’ button instead.
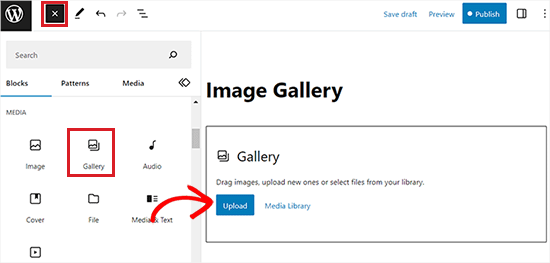
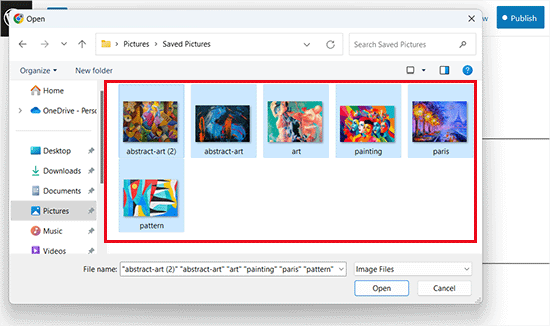
If you click on the ‘Upload’ button, then you can generally upload one photo from the computer at a time.
However, you can select and open multiple images with the Ctrl key held down on your keyboard.
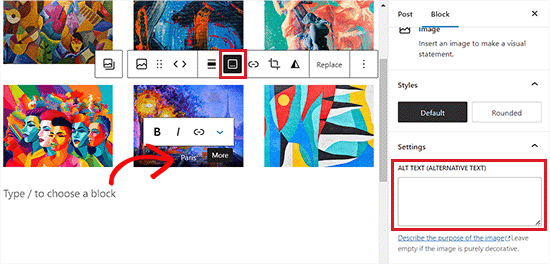
After you have uploaded all the images, you can add captions by clicking on the ‘Add Caption’ icon in the block toolbar at the top of individual images.
You can also add alt text to the images from the block panel on the right.
If you select the ‘Media Library’ button, then you will be able to choose multiple images for your gallery all at once.
As you select images, you can also enter the image alt text, title, and caption from the attachment details panel on the right side.
Once you have added all the images, simply click the ‘Create a new gallery’ button.
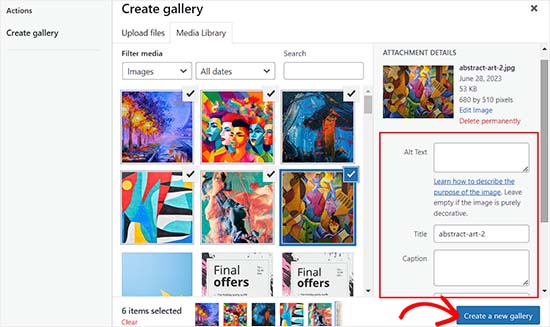
This will direct you to the ‘Edit Gallery’ page in the media library prompt.
From here, you can select individual images and add a caption, title, description, or alt text to them.
Once you are done, simply click the ‘Insert Gallery’ button at the bottom right corner.
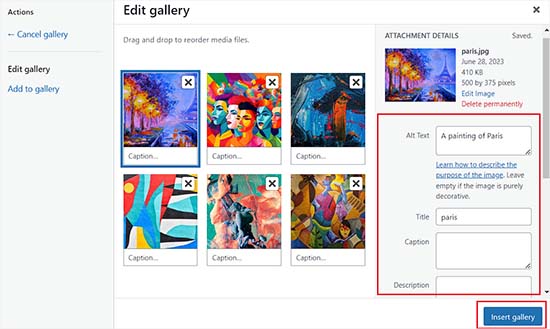
The image gallery you created will now be added to the WordPress editor.
You can also further customize it by selecting the Gallery block and configuring its settings from the block panel on the right.
For example, you can use the ‘Columns’ slider to decide the number of columns and rows for your galleries.
You can even toggle the ‘Crop Image’ switch to crop the thumbnails for better alignment.
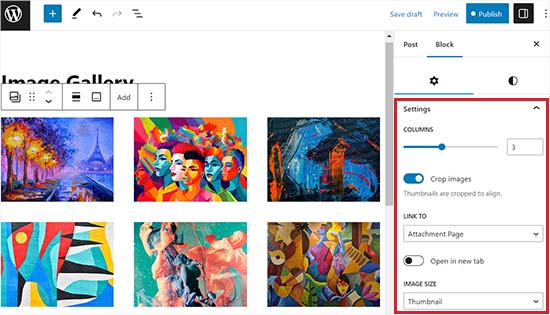
From the ‘Link to’ options, you can choose None if you want your users to only view your photo. This option disables the clicking feature for your images.
However, if you select the ‘Media File’ option, then the images will be clickable, and the image file will open when clicked. Similarly, the attachment page will open if you select the ‘Attachment Page’ option.
Once you are happy with the settings, click the ‘Publish’ or ‘Update’ button at the top to store your settings.
Finally, you can visit your WordPress blog to see the image gallery in action.

You have now easily created an image gallery for your website. However, you will soon notice that it lacks some essential features.
For example, your images will either not be clickable or open on a new page. If you link your gallery images to the media file or attachment page, then users will have to click on the back button to view the gallery again.
This is not user-friendly and can discourage users from further exploring your website.
Similarly, the gallery’s appearance also depends on the WordPress theme that you are using.
Plus, you can’t organize your galleries into albums, topics, tags, and more. Your gallery is not stored anywhere, and if you need to add the same gallery again, then you will have to recreate it.
If you want to add more professional-looking galleries, you should use the next method.
Method 2: Create an Image Gallery Using Envira Gallery (Recommended)
If you want to create a more functional and aesthetically pleasing image gallery for your WordPress site, then this method is for you.
We will be using the Envira Gallery plugin as it is the best WordPress image gallery plugin on the market.
Envira allows you to easily create fully responsive, beautiful, and modern image galleries in WordPress. It is super fast and comes with many features like a lightbox popup, easy image navigation, a drag-and-drop builder, and professional gallery templates.
Before recommending the plugin, we thoroughly tested it on our demo website and have had excellent results. Envira Gallery is beginner-friendly and responsive, making it a great choice. To learn more, see our Envira Gallery review.
First, you need to install and activate the Envira Gallery plugin. For more details, see our step-by-step guide on how to install a WordPress plugin.
Upon activation, head over to the Envira Gallery » Settings page from the WordPress dashboard to enter your license key.
You can get this key from your account on the Envira Gallery website.
Note: Envira Gallery also has a free plugin that you can use. However, we will be using the pro version for this tutorial to unlock more features.
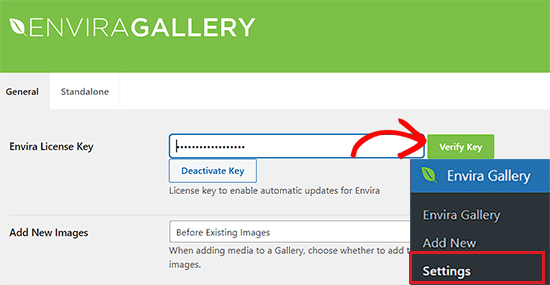
After verifying your license key, you can head over to the Envira Gallery » Add New page from the WordPress sidebar to start creating your first gallery.
Once you are there, provide a title for your gallery and then click on the ‘Select files from computer’ button to upload your images.
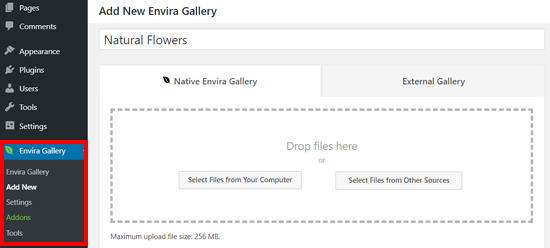
You can also upload images from your WordPress media library by clicking on the ‘Select files from other sources’ button.
Keep in mind that if you use this option, then you can only upload a single image at a time from the media library.
Upon uploading the images, scroll down to the ‘Gallery’ section, where all your photos will now appear.
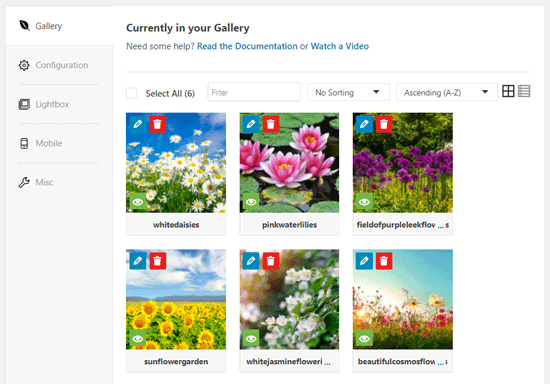
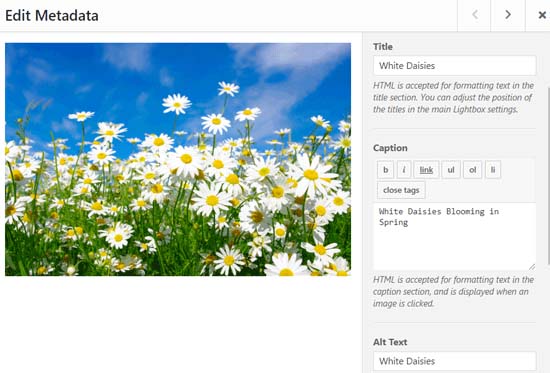
Next, you can click on the pencil icon at the top of each image to open the ‘Edit Metadata’ prompt on the screen.
From here, you will be able to add the caption, status, title, and alternative text for individual images.
Once you are done, don’t forget to click the ‘Save Metadata’ button to save your image captions.
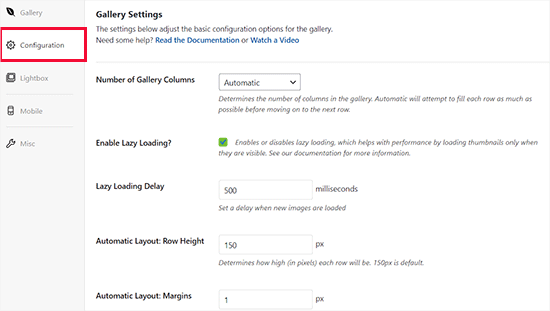
Next, you need to click on the ‘Configuration’ tab from the sidebar on the left.
From here, you can change your gallery layout, including the number of columns, image lazy loading, image size, title and caption positioning, margins, heights, thumbnail sizes, image dimensions, and more.
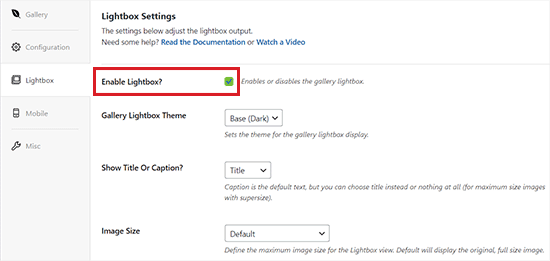
After that, switch to the ‘Lightbox’ tab from the left sidebar and check the ‘Enable Lightbox’ option.
This option will allow users to enlarge images and browse them without leaving the page.
You can leave the other default settings as they are because they work very well for most websites, but you can review the options and change them if you like.
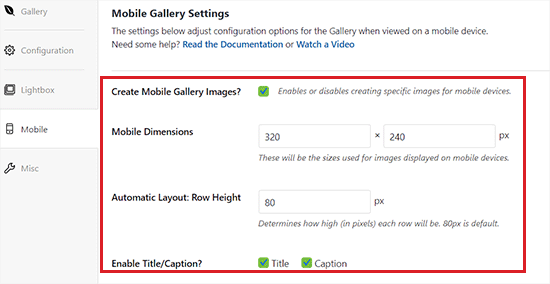
Next, click on the ‘Mobile’ tab to configure your gallery settings for mobile devices.
From here, you can choose image dimensions for mobile devices, enable or disable Lightbox, enable/disable image captions, and more.
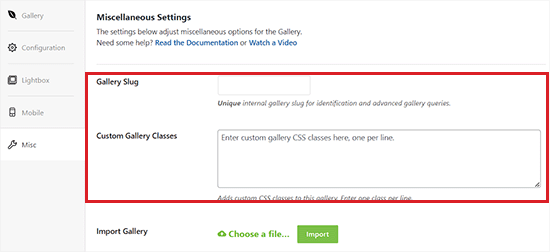
After that, you can review more options like gallery slug and adding custom CSS from the ‘Misc’ section.
Once you are happy with your settings, just click the ‘Publish’ button at the top to store your changes.
Next, you need to open up a post or page where you want to embed your gallery.
Once you are there, click the ‘+’ button in the top left corner of the screen to open the block menu.
Next, simply find and add the Envira Gallery block to the page or post.
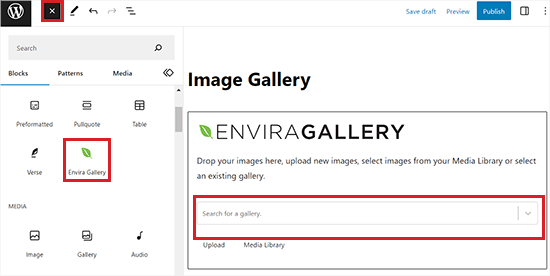
Once you have done that, you need to add your image gallery from the dropdown menu in the Envira Gallery block.
Finally, click the ‘Update’ or’ Publish’ button at the top to save your changes.
Now, you can view your image gallery on your WordPress website.

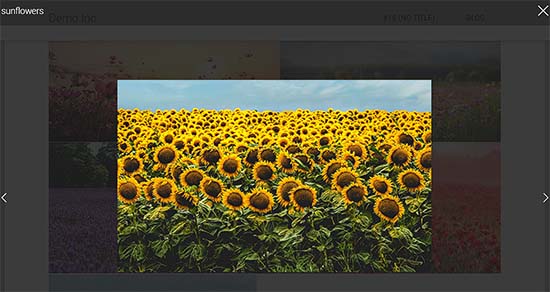
Here, you will notice that clicking on any image in the gallery will open it in full size with the lightbox effect.
You can also browse images in this popup by pressing the left and right arrow keys on the screen or your keyboard.
Bonus: Optimize Gallery Images For Search Engines
It is important to optimize all your gallery images without losing web quality so that search engines can index them for the right keywords.
This can help boost your page loading speed, improve user experience, enhance social media shares, and bring organic traffic to your website.
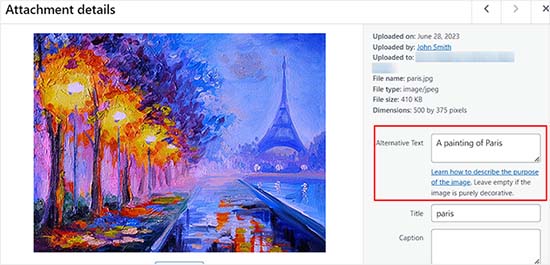
You can easily optimize your gallery images by adding alt text in the attachment details page. This description is shown to the search engine crawlers and helps your image galleries rank higher.
Additionally, you can also use All in One SEO, which is the best WordPress SEO plugin on the market.
It comes with an Image SEO addon that will automatically set your alt text, image titles, captions, and more. It will also add a proper image sitemap and other SEO features to improve your SEO ranking.
For more information, see our AIOSEO review.

Other than that, you should also use descriptive file names for your images, use relevant keywords, and share your galleries on social media. For more tips, see our beginner’s guide on how to optimize images for search engines.
Video Tutorial
If you learn better with visual aids, then you might want to check out our video tutorial:
We hope this article helped you learn how to create an image gallery in WordPress. You may also want to see our comparison between WebP vs. PNG vs. JPEG: the best image format for WordPress and our expert picks of the best WordPress plugins for managing images.
If you liked this article, then please subscribe to our YouTube Channel for WordPress video tutorials. You can also find us on Twitter and Facebook.


Seba
Hi
For me i would like to have an option in configuration that after last picture there is exit from gallery instead of infinity loop. Do You know solution?
regards Seba
WPBeginner Support
For a question like that we would recommend reaching out to the plugin’s support and they should be able to let you know if it is an option or if you need a custom solution.
Admin
Olaf
The block editor and its gallery are usually sufficient for many websites. What I sometimes struggle with, though, is the lack of effects, as clients often expect the gallery to have a certain “WOW” factor. I understand their perspective, but it’s challenging to achieve that with the block editor alone. Envira Gallery seems like a solid plugin that can do a lot based on its description. The article mentions a license key, so it’s a paid plugin. Does this plugin also have a lite version? I’d prefer to try out its features first, because if it’s really good, I would have use for it and would happily pay for the pro version. But I always want the option to test a plugin first, even with limited functionality.
Jiří Vaněk
I had been looking for a plugin to replace the galleries I created in Elementor Pro for a long time. They’re not bad, but they aren’t perfect either. The Envira Gallery plugin has completely impressed me with its features and especially its effects. Thanks to this plugin, I was finally able to add galleries with a hover zoom effect to WooCommerce. This plugin is unbeatable, and I’m glad I came across it through your series of articles. I’m gradually replacing the original Elementor galleries, and it looks fantastic.
kzain
This breakdown of using the built-in WordPress gallery and the Envira Gallery plugin offers valuable options for creating beautiful image presentations. The point about using high-quality images for optimal impact is well-made but I have a quick question Can I add lightbox functionality to the built-in WordPress gallery?
WPBeginner Support
To do that you would need a plugin on your site, we do not have a specific plugin for only that functionality at the moment but we will be sure to share should that change! For now we would recommend Envira to add that functionality to your content.
Admin
Chris
I just started using standard wordpress image galleries. When I add images to the gallery, if I do not have enough images to fill an entire row, the last row’s image is displayed at a size that allows the image to fill the full width of the container. So the default of 3 images per row applies until the row runs out of images, then I get a final row with a giant image. Is there a way to force every image to the same size so that the gallery just has all images the same size, regardless of whether the row it appears in is full?
WPBeginner Support
For that, you would want all of your images uploaded to be the same size and then you would uncheck the crop images checkbox that forces your images to align.
Admin
Roger Novak
Can separate clickable links be attached/embedded to each picture in a gallery that will take the viewer to another web site?