You Google your name, and the first thing that pops up is a website that’s all about you. Your achievements, your thoughts, your vision. Sounds pretty great, right?
That’s the power of a personal website. It’s like having your own little corner of the internet where you can showcase your skills and share your thoughts. And trust us, after helping thousands of folks create their own site, we’ve seen how it can be a game-changer.
In this guide, we’re going to show you how to build your personal brand by creating a website using WordPress.
Why and Who Needs a Personal Website?
In our opinion, everyone needs to build a personal website, whether you are an entrepreneur, small business owner, doctor, professor, real estate broker, or a student.
In today’s information age, anyone can Google your name and learn a lot more about you than you can imagine.
While having social media profiles is great, social networks come and go. You need a platform of your own where you can publish anything you want. A platform where you are the star.
Building a personal website allows you to market yourself on the internet.
It helps you not just earn trust, which in itself is invaluable. You can also build a following, become a thought leader, make friends, and find a lot of new opportunities.
Even if you don’t like the idea of marketing yourself, you’ll still be judged by what you put online.
That being said, let’s take a look at how to easily build a personal website that actually helps you succeed.
What You Need to Build a Personal Website

First, you need to make sure that you are using the right platform to build your website.
We recommend using WordPress because it is the best website builder on the market. It powers more than 43% of all websites on the internet.
Now, when we say WordPress, we are talking about WordPress.org and not WordPress.com which is a hosting service.
To learn more see our article on the difference between WordPress.org vs WordPress.com.
You’ll need the following things to build your personal website using WordPress:
- A domain name (e.g. SyedBalkhi.com). This is what users will type in their browsers to reach your website. For personal websites, many people use their own names as domain names when possible.
- A website hosting account. This is where all your website files will be stored.
Now, normally a domain name would cost you about $14.99 per year and website hosting starts at $7.99 per month (usually paid annually).
If you are just starting out, then this may sound like a lot of money.
Luckily, the folks at Bluehost have agreed to offer WPBeginner users a free domain name with a generous discount on hosting. Basically, you can get started for as little as $1.99 per month.
Bluehost is one of the largest hosting companies in the world and an officially recommended WordPress hosting provider.
If you can spend a little extra money, then do check out Hostinger, SiteGround, or WP Engine. For more hosting recommendations, see our WordPress hosting guide for side-by-side comparisons.
Now, let’s get on to the tutorial. You can use the quick links below to navigate through the article:
- Step 1: Set Up Your Personal Website
- Step 2: Get a Personal Website WordPress Theme
- Step 3: Create Content for Your Personal Website
- Step 4: Add a Portfolio Section to Your Personal Website
- Step 5: Add a Blog Section to Your Personal Website
- Step 6: Add Testimonials to Your Personal Website
- Step 6: Integrate Your Personal Website to Social Media Profiles
- Step 7: Start Building an Email List
- Step 8: Implement Growth Hacking for Personal Websites
Step 1: Set Up Your Personal Website
For the sake of this tutorial, we’ll show you how to set up a personal website on Bluehost. For other hosting companies, you can see our complete WordPress installation tutorial.
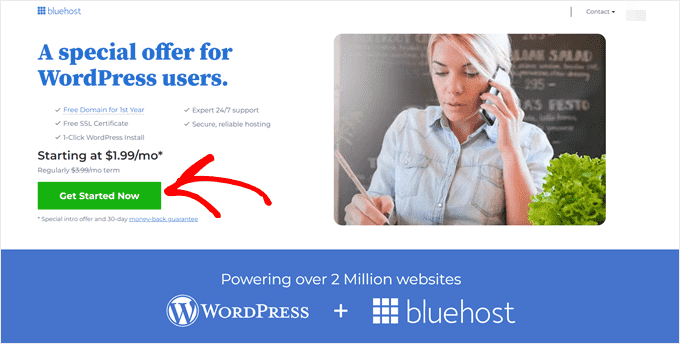
First, you need to visit the Bluehost website and click on the green ‘Get Started Now’ button.
Next, you’ll be asked to choose a hosting plan.
Most beginners start with the Basic or Choice Plus plans.
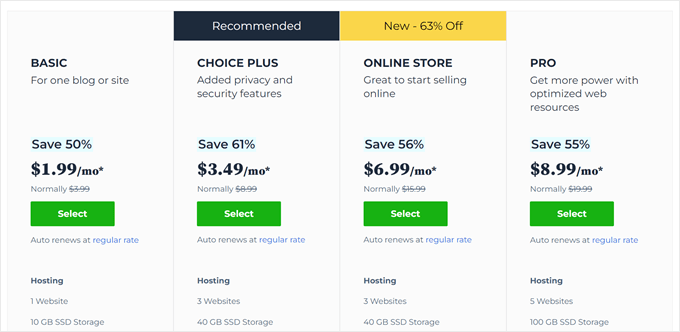
Click ‘Select’ to choose a hosting plan and continue.
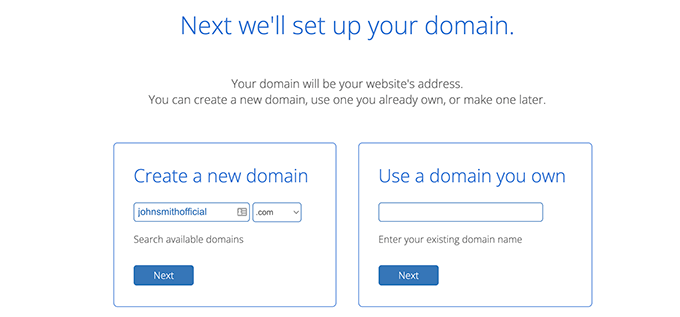
After that, you’ll be asked to choose a domain name. Enter your desired domain name and click on the ‘Next’ button to continue.
Next, you will need to add your account information and finalize the package info to complete the process.
On this screen, you’ll see optional extras that you can purchase. We recommend unchecking all of them. You can always add them later if needed.
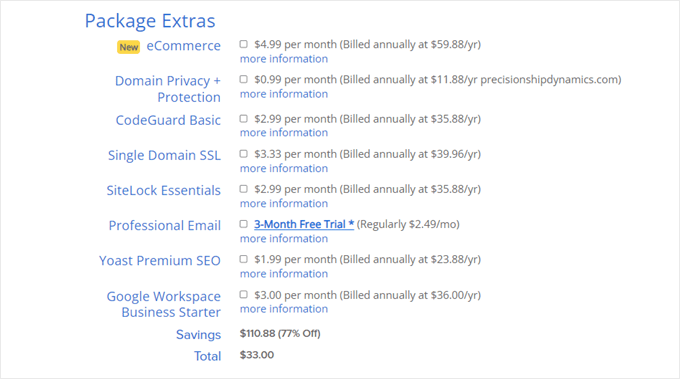
Lastly, you need to add the payment information to complete the purchase.
Once completed, you’ll receive an email with details on how to log in to your web hosting control panel. This is where you manage everything from support to emails, among other things.
Bluehost will automatically install WordPress for you. Simply log in to your hosting account dashboard and navigate to the ‘Websites’ tab. Then, click on ‘Edit Site.’
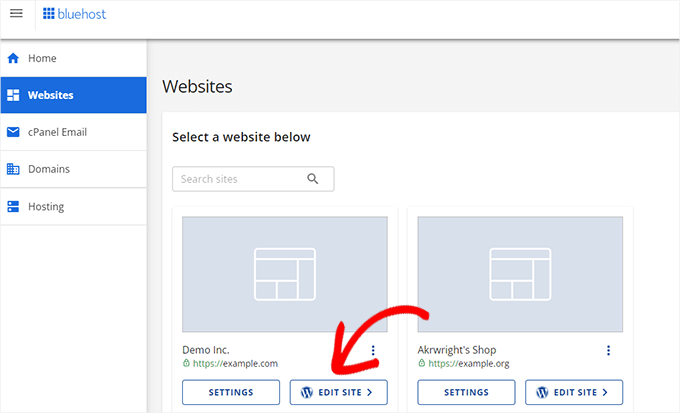
This will bring you to your WordPress admin area.
It will look something like this:
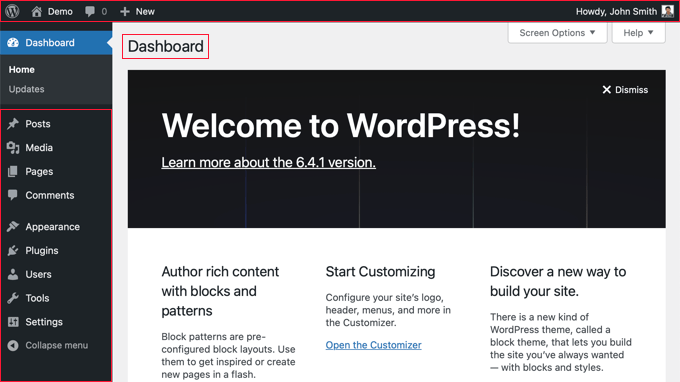
Congrats, you have successfully set up your personal website.
In the next few steps, we will show you how to configure it to your own style, add content, and make a professional-looking website.
Step 2: Get a Personal Website WordPress Theme
The way your personal website looks is very important to make a good first impression.
WordPress comes with thousands of free and premium themes that you can use for your personal website.
However, this abundance of choices also makes it a bit difficult to find the right theme.
To make this choice easier, we have compiled some lists of our favorite WordPress themes under different categories:
- Best WordPress Themes of the Year
- Best Free WordPress Blog Themes
- Best WordPress Portfolio Themes
- Best WordPress Themes for Photographers
As a general rule, we recommend using a simple theme with lots of white space. This makes any website look clean and more professional.
Alternative: Use a WordPress Page Builder to Design Your Website
While WordPress themes are extremely easy to use and customize, sometimes you may not find the right layout for your needs.
This is where SeedProd comes in. It is the best WordPress page builder plugin on the market and allows you to easily create custom layouts for your website.
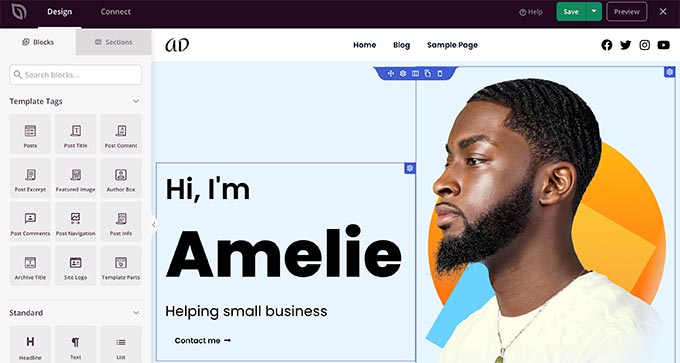
It comes with dozens of templates to use as a starting point.
After that, you can add new elements with drag and drop or edit any aspect of the layout by simply pointing and clicking.
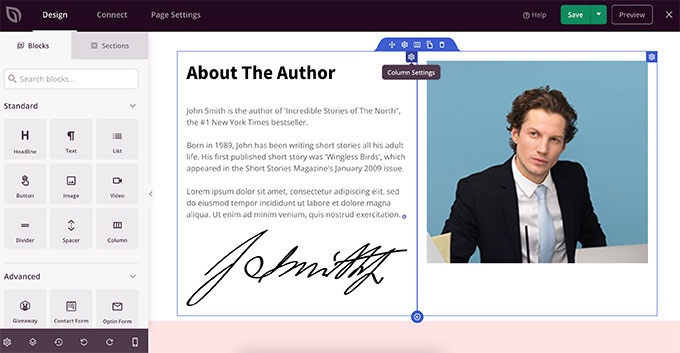
You can even use it to create a custom WordPress theme without writing any code.
The best part is that SeedProd is theme agnostic, so it will work with any WordPress theme that you are using on your website.
Choosing a theme is only half the fun of designing a website. Don’t forget to pick a color scheme that perfectly suits your brand and add a custom logo to make your site look more professional.
Step 3: Create Content for Your Personal Website
Once you have selected a design for your website, the next step is to start adding content.
WordPress comes with two commonly used content types by default. These are called posts and pages.
While posts are part of a blog, pages are used to create important sections of your WordPress website and give it a proper structure.
To create a page, you need to simply head over to Pages » Add New page. First, provide a title for your page and then start adding content below.
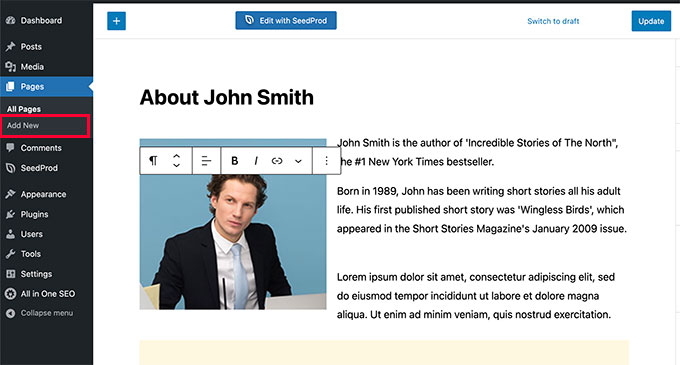
WordPress comes with an intuitive content editor that allows you to add content elements as blocks. This way you can create beautiful content layouts for all your posts and pages.
To familiarize yourself with the editor, see our tutorial on how to use WordPress content editor for beginners.
Following are a few important pages that you can add to your personal website.
About Page

You need to create an About page where users can learn more about you.
Many personal site owners use their About page as the front page of their website.
Use the About page to tell users who you are, what you do, what awards you have won, and link to some samples of your work.
Let users know how they can get in touch with you through social media and by email. Take a look at our CEO, Syed Balkhi’s about page for inspiration.
Contact Page
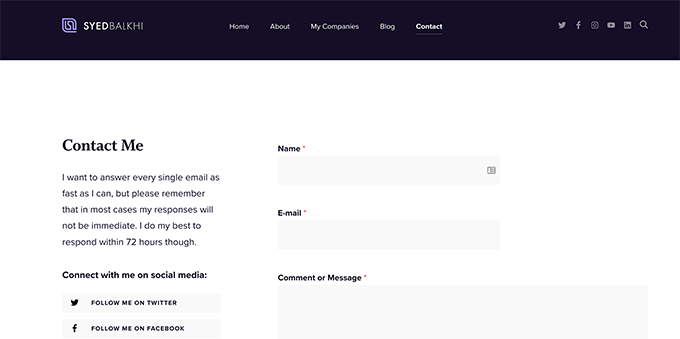
A lot of people don’t want to contact you through social media. This is why you will see contact pages on almost every website on the internet.
You need to add a contact page on your website with information about how users can send you a quick message.
WordPress does not come with a built-in contact form, but there are dozens of form builder plugins available.
We recommend using WPForms, which is the best WordPress contact form plugin on the market. It is used by over 6 million websites.
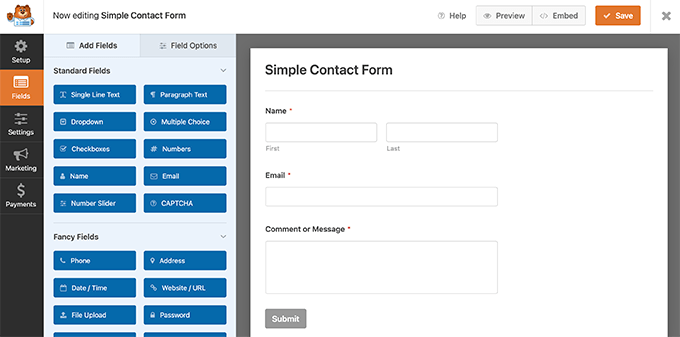
It allows you to easily create beautiful forms for your website using a simple drag-and-drop tool.
Note: There is also a free version of WPForms with limited features called WPForms Lite.
Step 4: Add a Portfolio Section to Your Personal Website
Personal websites allow you to prominently showcase your work by adding a portfolio section.
Many professionals like photographers, artists, writers, designers, and programmers, need an easy way to showcase their work on their website.
In WordPress, you have multiple options to beautifully add a portfolio section to your personal website.
Method 1: Add Portfolio Using The Default WordPress Editor
This method is easier, and you can create a portfolio by simply creating a portfolio page on your website.
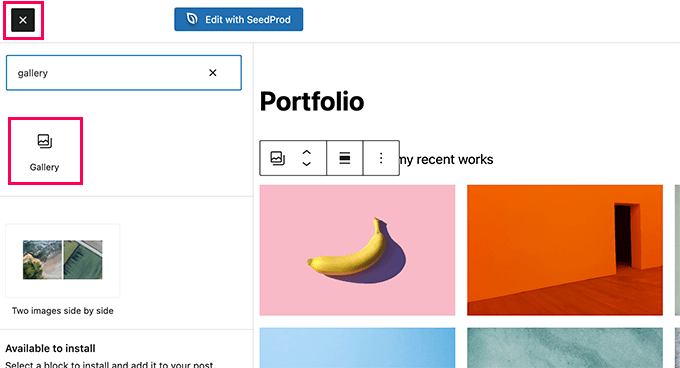
You can add the default Gallery block to showcase photos and images. You can also create a separate page for each item in your portfolio and then link images on the main portfolio page to the corresponding page.
Method 2: Add Portfolio Using a Gallery Plugin
This method is recommended for creating a media-rich portfolio, particularly if you are a photographer, graphics or web designer, video creator, and more. We recommend using Envira Gallery.
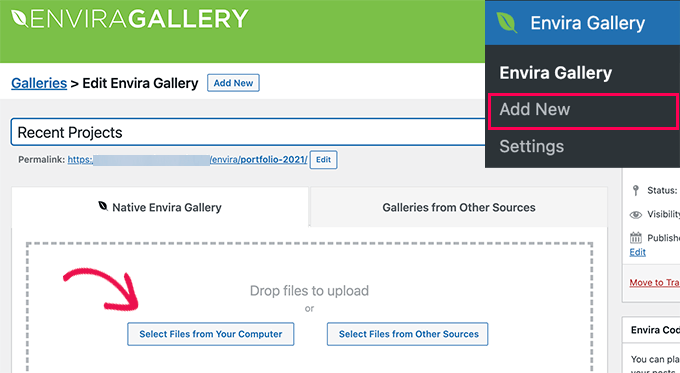
It is the best WordPress gallery plugin on the market and allows you to easily add beautiful galleries to showcase on your portfolio page.
Envira Gallery allows you to create albums, organize your works by tags, add video galleries, and open gallery images in popups and sliders.
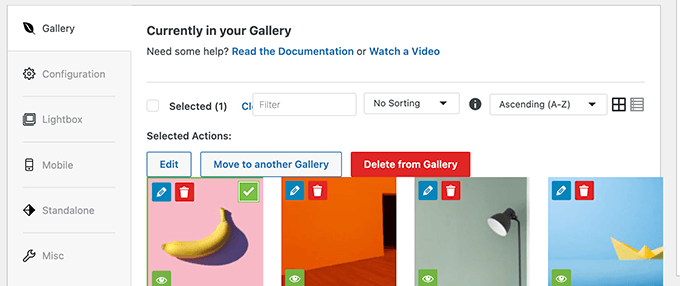
These galleries can be added anywhere and look good on mobile too.
Method 3: Create a Portfolio Section Using a Plugin
This method is more flexible and recommended for all users.
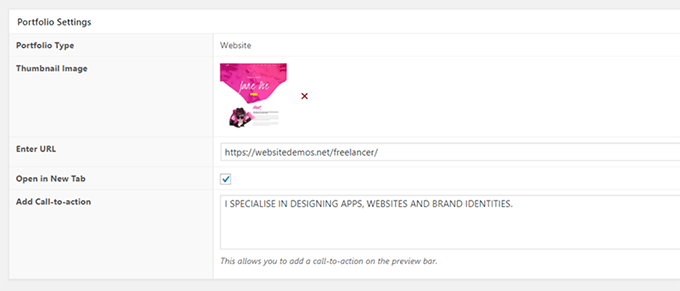
For this method, you’ll need the WP Portfolio plugin. It’s one of the best WordPress portfolio plugins that allows you to easily create a beautiful portfolio section for your personal websites.
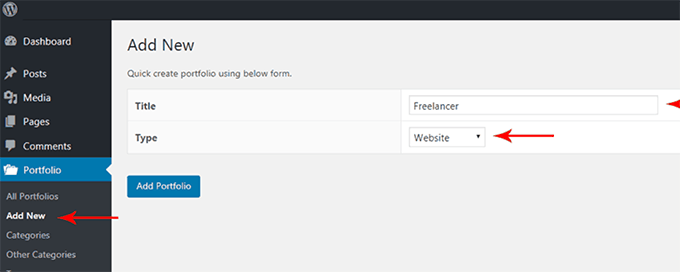
You can create a portfolio to showcase images, videos, or websites (useful for web designers).
After that, you can add portfolio items by providing details like a thumbnail, description, category, and more.
Step 5: Add a Blog Section to Your Personal Website
Adding a blog section to your personal website allows you to easily post regular updates on your website.
These updates could be about your work, personal life, or anything you want. It also helps your personal website rank for the right keywords related to its main topics.
WordPress started as a blogging platform, so it is still very well-equipped to start a blog and grow it.
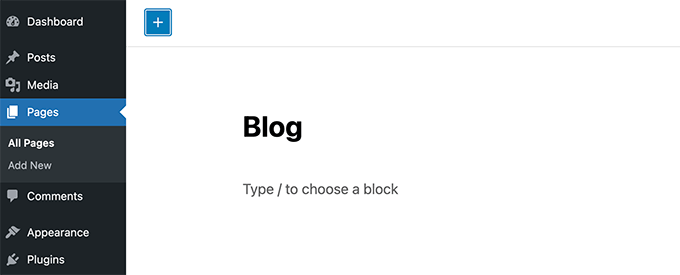
Simply create a new page in WordPress and give it a title like ‘Blog’.
After that, go to Settings » Reading page.
Under the ‘Your homepage displays’ option, select the ‘A static page’ option.

Below that, you can choose the page you want to use as your home page and the blog page you created earlier. Don’t forget to click on the ‘Save changes’ button to store your settings.
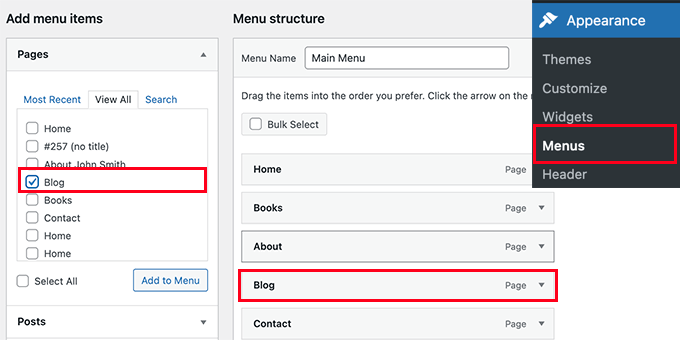
You can now add the Blog page to your website’s navigation menu.
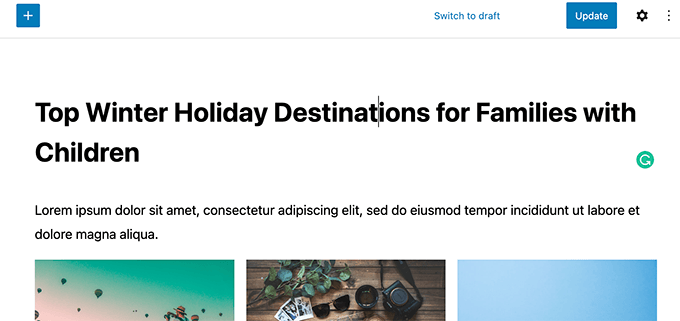
To write new blog posts, simply go to Posts » Add New page and start writing.
For details, take a look at our article on how to add a new blog post in WordPress.
Step 6: Add Testimonials to Your Personal Website
Testimonials help you show off what others are saying about you.
This kind of social proof helps you establish authority and develop trust.
Adding testimonials to your WordPress site is quite easy. We’ll show you two methods and you can choose one that works best for you.
Add Testimonials Using Strong Testimonials
First, you need to install and activate the Strong Testimonials plugin.
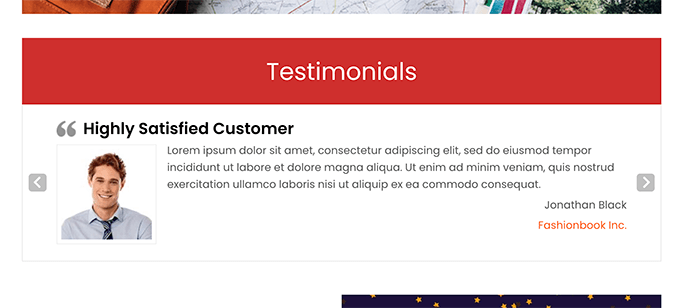
It allows you to easily add testimonials to your website and then displays them using shortcodes.
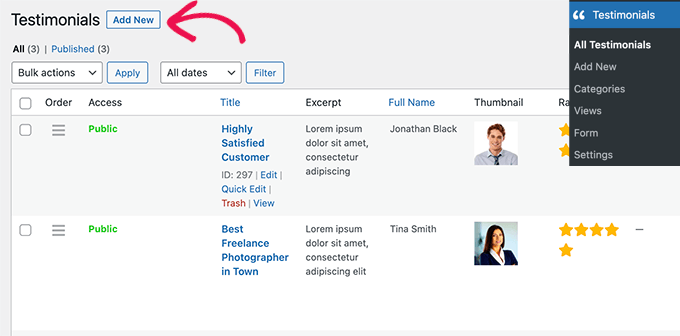
Next, decide where you want to display testimonials.
You can add them to your homepage or any other page, sidebar, or blog post.
Add Testimonials Using SeedProd
This method is easier and recommended for beginners.
For this method, you’ll need SeedProd. It is the best WordPress page builder plugin that allows you to easily create beautiful pages for your website.
SeedProd comes with a built-in testimonials block that you can drag and drop to your homepage or a testimonials page.
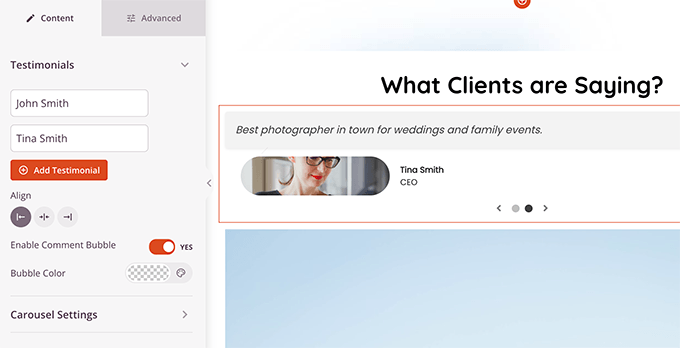
For more details, see our tutorial on how to add rotating testimonials in WordPress.
Step 6: Integrate Your Personal Website to Social Media Profiles
There is no denying that social media can help you promote your personal brand to more audiences.
There are countless WordPress plugins that allow you to integrate social media buttons and widgets on your website. However, many of them will slow down your website which is bad for SEO and user experience.
Following are a few social media plugins that work like a charm without slowing down your website.
1. Smash Balloon Social Media Feeds for WordPress
Smash Balloon’s Social Media Feeds for WordPress is one of the best social media plugins for WordPress. It comes as a toolkit to display content from your different social media profiles on your personal website.
Normally, WordPress doesn’t let you embed content from Facebook and Instagram directly. Smash Balloon’s Facebook and Instagram feeds allow you to easily embed content from those platforms in WordPress.

It also works for Facebook Groups, YouTube, TikTok, and Twitter. You also get options to choose different styles and layouts for your feed.
Novashare allows you to easily display social share buttons on your WordPress posts and pages. You can also add follow buttons and click-to-post buttons to maximize traffic.
Unlike other social sharing buttons, Novashare is super lightweight. It was built with Google Core Web Vitals in mind, so you won’t have to worry about it slowing down your site.
Check out our complete Novashare review for more information.
It takes a lot of time to write a blog post and then go on and post it manually to all your social profiles.
Uncanny Automator is the best WordPress automation tool on the market. Using it you can easily automate social media tasks when you perform a certain action on your WordPress site.
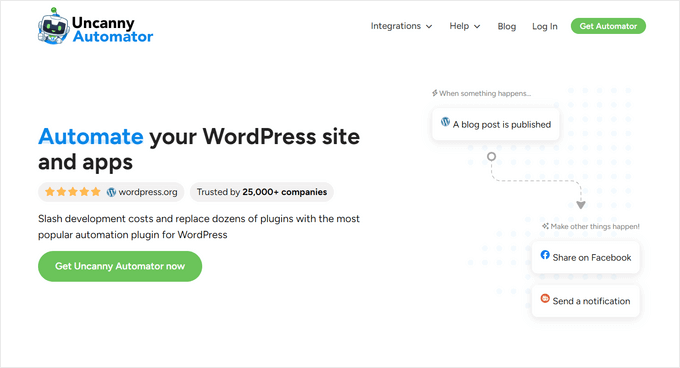
It works with dozens of essential WordPress plugins like WPForms, MemberPress, WooCommerce, and more. Plus you can connect to apps on Zapier, and even your smart devices using IFTTT.
Basically, you can automate your WordPress site to perform routine tasks behind the scenes.
You can also use a tool like ClickSocial to automate social media posting.
With ClickSocial, you can schedule your social media posts in advance and automatically share old WordPress posts on a regular basis.
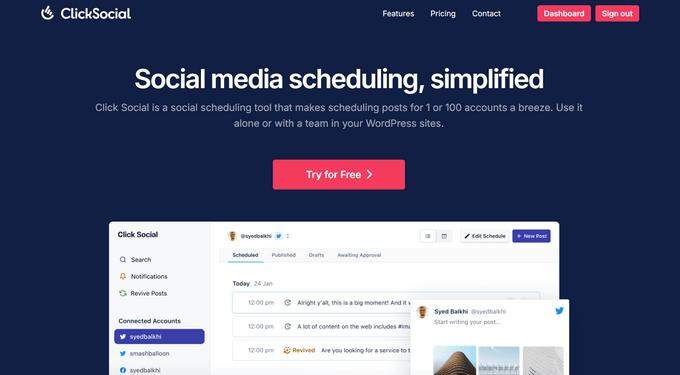
It comes with an intuitive post editor so that you can create engaging social media posts for Facebook, Instagram, and Twitter right from your WordPress website.
Step 7: Start Building an Email List
Social media platforms are a great way to build your personal brand on the internet. However, you don’t own those platforms and if they block you then you’ll lose your following instantly.
That’s why all the smart marketers will tell you to start building your email list right away. Email marketing gives you direct access to a user’s inbox and it is much cheaper than boosting your posts on social media.
We recommend using Constant Contact which is the most beginner-friendly email marketing service on the market, suitable for both personal and small business websites.

Once you have signed up for Constant Contact, you can add an email newsletter sign-up form by using the default embed code or by using WPForms.
However, that won’t get you as many subscribers as you need. For that, we have some more tips ahead.
Pro Tip: Want to make sure your newsletters actually get sent and not marked as spam? Make your business email more credible by adding a verified logo.
Step 8: Implement Growth Hacking for Personal Websites
Now that you have added different types of content to your personal website. It is time to start promoting it to establish your personal brand and grow your influence.
Luckily, WordPress gives you access to powerful tools that help you quickly grow your website without any special marketing skills.
1. Get More Email Signups and Social Followers
Simply adding social media buttons to your website or an email sign-up form for your newsletter doesn’t help you gain more followers.
You’ll have to nudge your users with more creative ways to take action.
This is where OptinMonster comes in. It is the best conversion optimization software on the market and allows you to easily convert website visitors into subscribers, leads, and customers.

It comes with intuitive tools like lightbox popups, exit-intent popups, countdown timers, header & footer bars, and more.
You can trigger your campaigns based on a variety of rulesets so that you don’t annoy users and only show them custom messages at the exact time.
2. Optimize Your WordPress SEO
SEO (Search Engine Optimization) helps you get more free traffic to your website from search engines.
Many beginners find SEO to be something too technical. Even though WordPress is very SEO-friendly out of the box there is still a lot more you can do.
You’ll need to install and activate the All in One SEO for WordPress plugin. It is the best WordPress SEO plugin on the market and allows you to easily optimize your website without any technical SEO skills.
Over 3 million websites use AIOSEO, and they have a free version as well.
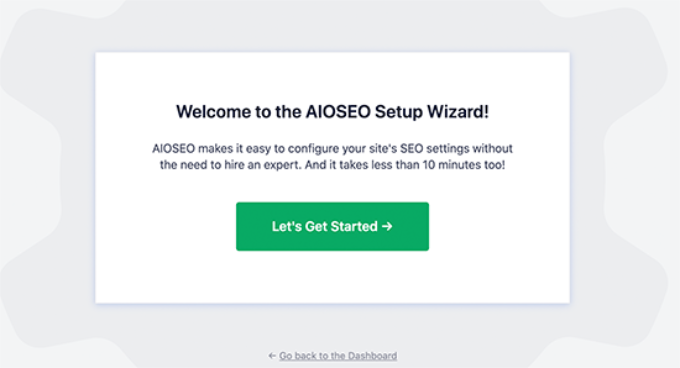
It comes with a setup wizard that will take care of the basic setup for you.
After that, it will show you a site-wide SEO audit with practical tips to improve your SEO.
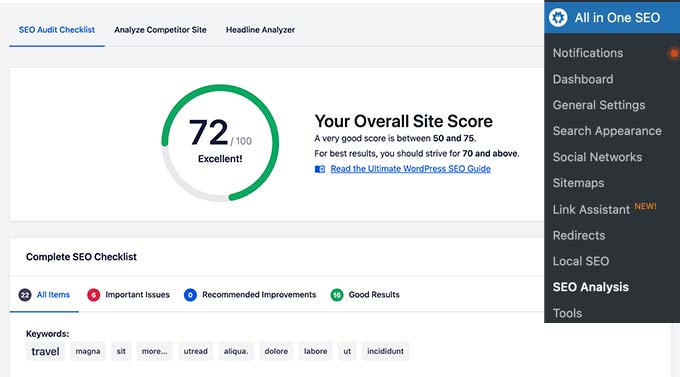
You’ll also see a TruSEO analysis for each post and page on your website with simple instructions for improvement.
Plus, it has advanced features like Schema markup, social media integration, Local SEO, Image SEO, powerful sitemaps, and more.
To learn more see our complete WordPress SEO guide for beginners or follow our All in One SEO setup tutorial.
3. Track Your Personal Website Analytics
Now that you have content on your personal website with a basic marketing infrastructure setup, it is time to see how your site is doing.
The easiest way to track your website analytics is by using MonsterInsights. It is the best Google Analytics plugin for WordPress and allows you to easily install Google Analytics on your personal website.
Once installed, it will start showing your most popular content and other website analytics right inside the WordPress dashboard.
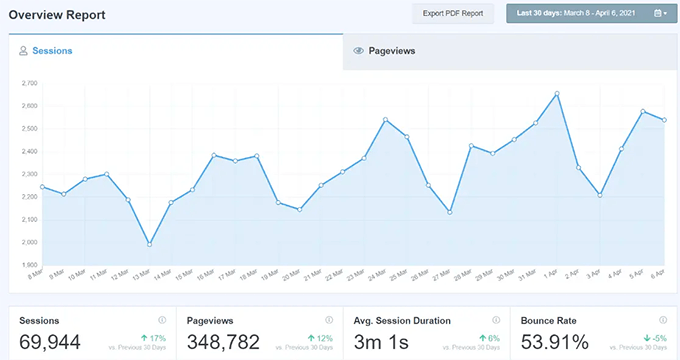
The free version of MonsterInsights is sufficient for most personal websites, but you can also upgrade to Pro for advanced tracking for buttons, forms, and eCommerce conversions. For more details, see our WordPress conversion tracking guide for beginners.
We hope this article helped you learn how to create a personal website using WordPress. You may also want to see what other types of websites you can make with WordPress or see these practical ideas to make money online using WordPress.
If you liked this article, then please subscribe to our YouTube Channel for WordPress video tutorials. You can also find us on Twitter and Facebook.


Stanley Ship
Overall a good read! Would love to see more of Wordpress plugins for personal branding
WPBeginner Support
Glad you liked our content
Admin
Nina
This article has really provided value to me. I had to share it on my FB page. I have so many other entrepreneurs and small business owners that I am blessed to connect with. I am certain they will find this information as valuable as I have. Keep writing and I will keep reading!
Matt K
Great Post, very informative I like the floating social bar plugin as well and have found that Google responds positively to its use.