Adding a free live chat feature to your WordPress site can boost customer engagement and support by providing real-time assistance to your visitors.
It lets you interact with website visitors in real time, so you can answer their questions and solve their problems immediately. This can get you more sales and encourage existing customers to stay loyal to your brand.
Many of our partner brands have been using live chat to assist customers, guiding them through the purchase process and answering any questions they may have. We have seen that this helps them create a positive impression on users, leading to more leads and increased conversions.
In this article, we will show you how to easily add live chat to your WordPress site the easy way.

Why Use Live Chat on Your WordPress Site?
According to eConsultancy, live chat has the highest level of satisfaction among all customer service channels. In fact, live chat satisfaction is 73%, much higher than email, phone, and SMS satisfaction.
For more live chat statistics, check out our marketing statistics, trends, and facts.
If you run an ecommerce store or have a small business, then live chat can convince customers to buy your products. You can also talk to shoppers who fail to complete the checkout process, which can help you recover abandoned carts. You might even suggest products or notify customers about a sale.
Additionally, you can use live chat to provide support to your existing customers in real-time and turn them into brand ambassadors who will recommend your business to friends and family.

That being said, let’s take a look at how to easily add a free live chat in WordPress.
Adding Live Chat to WordPress
The easiest way to add a live chat feature to your website is by using LiveChat Inc. It is one of the best WordPress live chat solutions, and we use it on our own OptinMonster site.
You can learn more about it in our LiveChat review.
The LiveChat WordPress plugin is free, although you will need to buy a paid subscription to the LiveChat service. Subscriptions start at $20.00 per month, but there’s also a 30-day trial, so you can test the service for free.
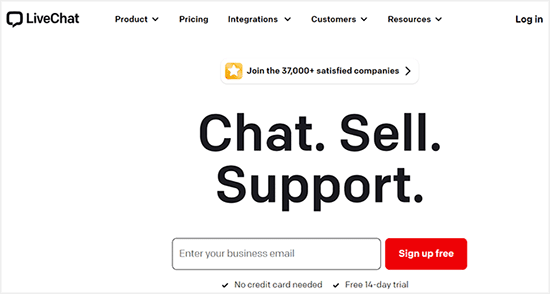
To get started, head over to the LiveChat website. Then, type in your business email address and select ‘Sign up for free.’
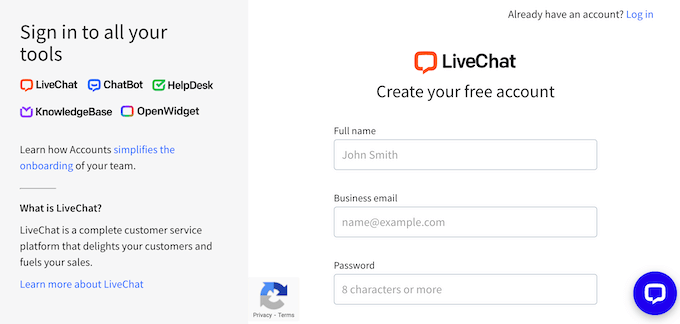
This takes you to a page where you can type in your company, business phone number, and password that you want to use.
After entering this information, click on ‘Create account.’
After a few moments, you’ll get an email asking you to verify your account. Simply open the email and click on the ‘Verify your account’ button.
Customizing the Appearance of the Live Chat Window
Your LiveChat window needs to grab users’ attention while complimenting your WordPress theme.
To change how the LiveChat windows look, log in to your LiveChat account using the email address and password you entered earlier.
In the left-hand menu, click on Settings. Then, select ‘Chat widget’ and ‘Customization.’
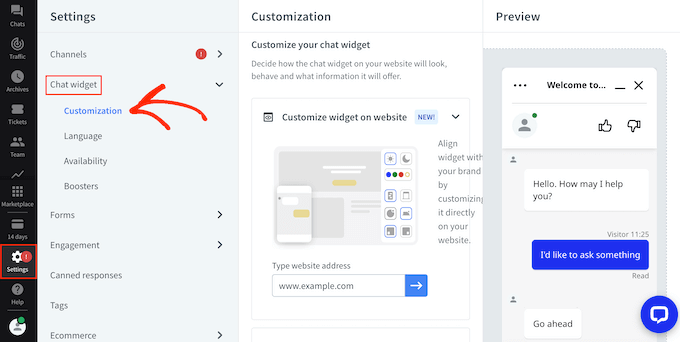
You can now style the live chat window and see your changes applied in real time.
To start, you can choose a theme for the maximized window and the minimized chat window.
Simply click on ‘Appearance’ to expand this section, and then click on the different themes to preview how they will look on your WooCommerce or similar store.
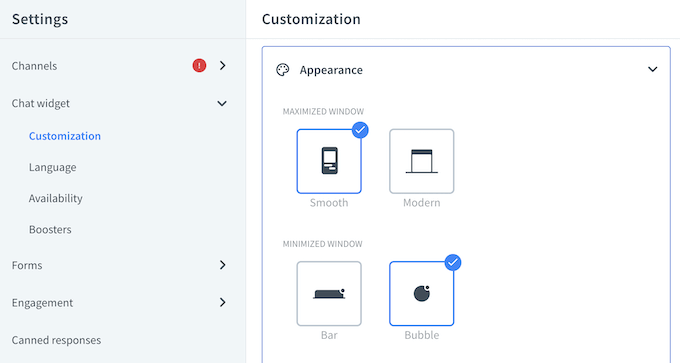
You can also switch between light and dark themes or apply any of the theme colors.
If you want to change the color of individual elements inside the chat window, then click the ‘More color settings’ button to access additional controls.
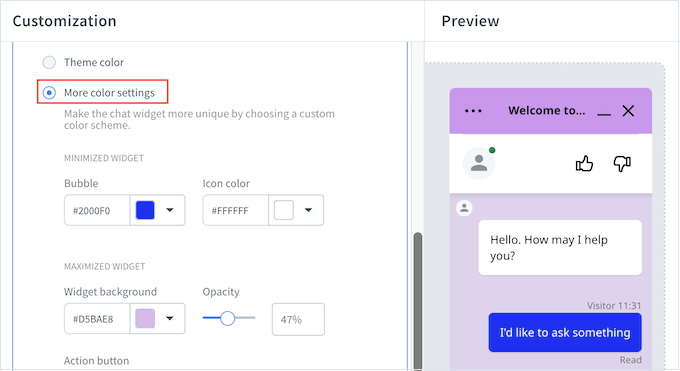
For tips on designing your chat window, see our step-by-step guide on how to choose the perfect color scheme.
By default, LiveChat shows a ‘Powered by LiveChat’ message next to the company logo at the bottom of the chat window.
To strengthen your branding, click on the ‘Additional Tweaks’ section and replace this with your own website logo.

Then, click on ‘Upload your logo’ and choose the image that you want to show instead.
You can also choose whether to show the agent’s photo, allow customers to rate agents, enable sound notifications, and more.
When you’re happy with how the chat window looks, click on ‘Save changes.’
Setting Up Live Chat on Your WordPress Website
The next step is adding LiveChat to your online marketplace or store using the free plugin.
To get started, install and activate the LiveChat plugin. If you need help, then check out our beginner’s guide on how to install a WordPress plugin.
Upon activation, you’ll be asked to log into your LiveChat account. Just type in your email address and click on the ‘Log in’ button.
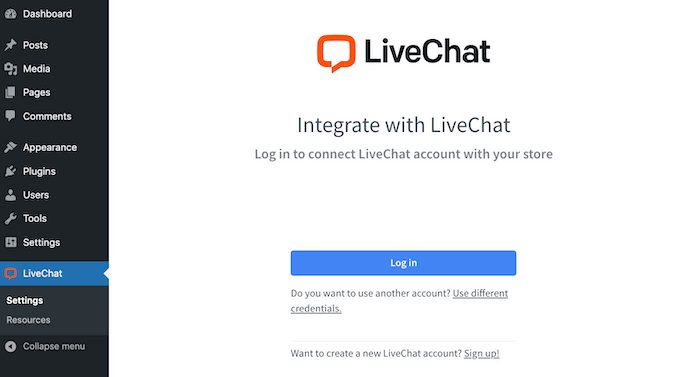
After a few moments, you will see a message that LiveChat has been successfully added to your WordPress website. Clicking on that bubble will open a live chat widget on your screen.
Now, if you visit your WordPress website, you’ll see the chat bubble in the bottom-right corner of the screen.
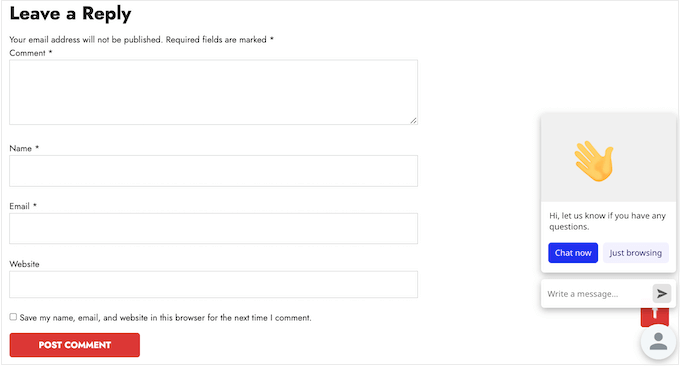
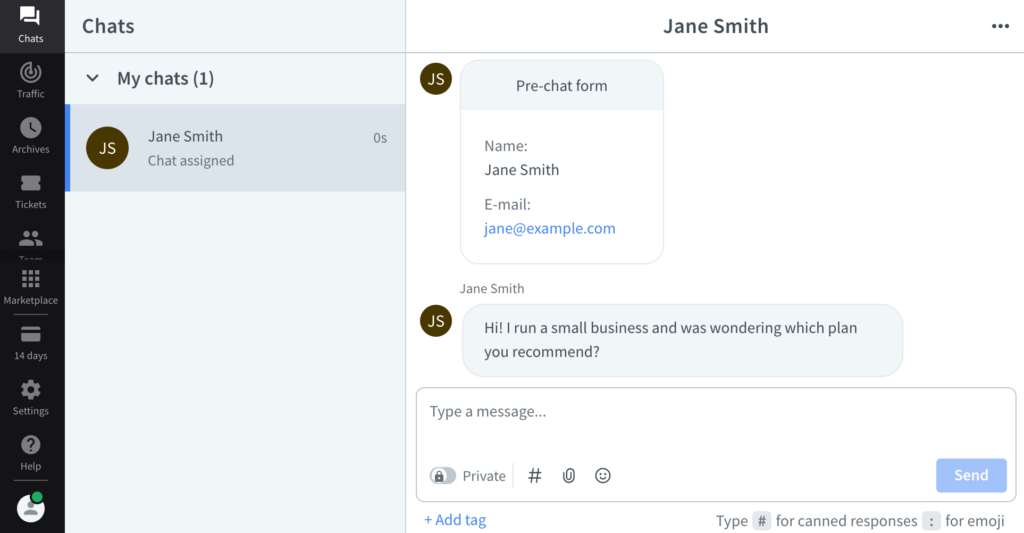
Every time someone tries to contact you, you’ll get a notification on your LiveChat account.
To reply to the visitor, simply type your response into the LiveChat dashboard.
How to Find Trained Live Chat Agents
LiveChat makes it easy to add live chat to your WordPress blog or website. However, you also need people to provide real-time support to your visitors.
The easiest solution is to outsource your customer support to LTVPlus, which is a managed live chat service for online businesses.

LTVPlus was started by the co-founder of MaxCDN, the content delivery solution we use on our WPBeginner website.
LTVPlus offers affordable live chat agents who can provide 24/7 support. This allows you to grow your business without having to hire expensive support and sales staff.
By using LiveChat and LTVPlus, you can add live chat to your website and take your business to the next level. In fact, we’ve used these two services to get more sales on our OptinMonster website.
We hope this tutorial helped you learn how to easily add live chat in WordPress. You may also want to see our list of the best bookkeeping services for your online business and our WordPress tutorial on how to add a chatbot in WordPress.
If you liked this article, then please subscribe to our YouTube Channel for WordPress video tutorials. You can also find us on Twitter and Facebook.


Ayush
Can we add chat feature if we have a localhost WordPress
WPBeginner Support
You would want to reach out to the support for the plugin for if they’re currently offering localhost support but for the moment they would not work on a local installation.
Admin
Ayokunnumi
This Website has been a good learning platform in my Wordpress Development. Thumbs up
WPBeginner Support
Glad our content has been helpful
Admin
Abdul Jabber
Thanks for your exclusive post. I want implement chating option without using any plugin if have any tutorial in this issue please send me the link. I will be happy.
mohan
hi in firebug i am finding remove marin-buttom space its showing path inline:1,
but i am trying find the original path can u guide me
Girish
Trying to add private chat on my site but failed. Please help.
Prince
Hello admin… I’m a great fan of wpbeginner.. I’ve searched your website and can’t find this … But, how do I display related post as u do in ur footer after comments..
WPBeginner Support
Please our tutorial on how to show related posts with thumbnails without using a plugin
Admin
Sangie Nativus
Guest chat access is a great way to get spam. I’ve been looking forever for a chat plugin for WP that uses the same user database. Some let ANYONE join the chat and others require all visitors to register on an external website AND charge you a monthly fee to do so.
Lame :E
I hope Chat Room will deliver exactly what I need. Simple live chat for my users =)
analyzes
Chat option 1: – is good ONLY if users are registered on your blog. It has NO options for guests at all. (87.8% of people will NOT register at a website just to ask a question or comment) – statistics
Chat option 2: WP and IRC are not good bedfellows. Anyone that’s been in the IRC world for even a short period of time knows how to use the vulnerabilities of WP (i’ll not post here, but easily found) to pull any users IP (even the admin) from the WP via IRC
Chat option 3: Adding a skype button, is akin to adding a facebook button , yahoo messenger button etc.. and has no place in “adding chat to wordpress” at all. (its not adding chat to wordpress) You may as well tell them to just type – add me on skype! and post their user name.
Chat option 4: See answer to chat option 3. Twitter is NOT chat for wordpress, nor is it part, able to be integrated, or otherwise remotely on subject yet again.
This entire blog post “how to add chat into wordpress” – even by title is misleading at best. I would remove options 2 – 4. (especially the IRC option for noobs, you’re just opening a new user up to vulnerabilities they have no idea how to patch) And clarifying that option 1 is only for registered users.
A link to your post (and my comment) has been supplied on our vulnerability site, i’ll be interested to see how your post changes if at all.
toodles
WPBeginner Support
Thanks for your time to analyze our post.
1. We did mention in the article that the first option will only work for registered users.
2. Our second option uses Kiwiirc which is actually web app. We don’t think that it makes a WordPress site vulnerable.
Admin